On a hydraulic disc brake, the lever feel tells you a lot: soft, inconsistent, or fading performance usually means air, tired fluid, or a service issue somewhere in the line. The brake flush vs bleed question matters because those symptoms point to different jobs, and choosing the wrong one can waste time or contaminate pads. In this guide, I break down the difference, when each service makes sense, and how I would handle it on an MTB that sees wet UK trails.
The practical difference before you buy fluid or touch the lever
- Bleeding removes trapped air and restores a firm, predictable lever feel.
- Flushing is a more thorough fluid change, useful when the oil is old, dirty, or contaminated.
- Most bike manuals talk about bleeding, but in workshops the word “flush” often means a deeper bleed with more fluid exchange.
- Air problems usually show up as a spongy lever; fluid problems show up as fading performance, dark fluid, or a brake that has been neglected.
- The wrong fluid is a bigger mistake than the wrong technique, so always match the brake system before you start.
- UK workshop bleeds are often around £25-£30 per brake, while a decent DIY kit usually pays for itself after a couple of services.
Flush and bleed are related but not identical
I do not treat bleeding and flushing as the same maintenance job. A bleed is about removing compressible air from the hydraulic circuit and restoring a firm lever; a flush is about pushing enough fresh fluid through the system to replace old, dirty, or contaminated fluid. In practice, workshops sometimes use the words loosely, but the distinction matters when you are deciding how far to go.
| Job | What it targets | Typical result | Best used when |
|---|---|---|---|
| Bleed | Air in the system and small amounts of disturbed fluid | Firmer lever and a more predictable bite point | After hose shortening, a lever swap, or when the brake feels spongy |
| Flush | Old, dirty, overheated, or contaminated fluid | Fresh fluid throughout the circuit | After a long service gap, contamination, or repeated heat fade |
In bike manuals, bleed is the standard term you will see most often. That is because most brands are mainly concerned with air removal and proper lever feel, while “flush” is more of a workshop shorthand for a deeper service. Once you separate those jobs, the symptoms start making sense, which is where the real diagnosis begins.
What each service fixes on a trail bike
When I diagnose a trail brake, I start with the feel at the lever and the history of the bike. A spongy lever almost always points to air or an incomplete bleed. A brake that used to work fine but now feels inconsistent after long descents, heavy rain, or a missed service interval is more likely to need a deeper fluid change.
- Spongy lever after hose work or a crash usually means air has entered the system, so a bleed is the first move.
- Lever pull that changes from ride to ride often suggests trapped micro-bubbles or fluid that was not fully purged last time.
- Dark, cloudy, or burnt-smelling fluid points me towards a flush, because the fluid itself is no longer doing its job cleanly.
- Inconsistent power on long descents can come from fluid age, heat, pad condition, or rotor size, so I do not blame the hydraulic circuit alone.
- A bike that has sat for months often needs more than a quick top-up, especially if the fluid has aged or moisture has found its way in.
A crucial limit: neither service fixes worn pads, glazed rotors, leaking seals, or a hose that is weeping fluid. If the problem keeps returning, I stop repeating the bleed and look for the mechanical fault instead. That leads naturally into the actual process, because the order of work matters.
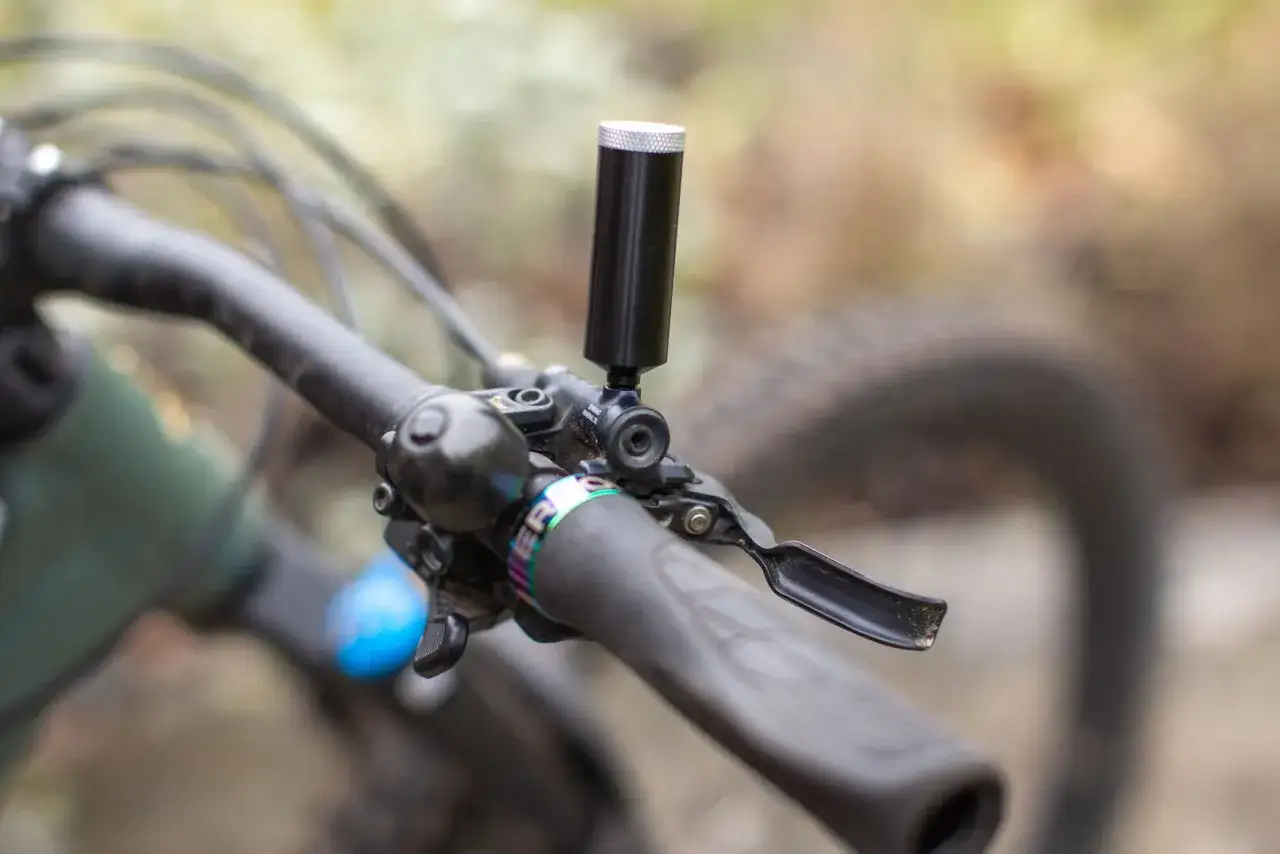
What the process looks like at the lever and caliper
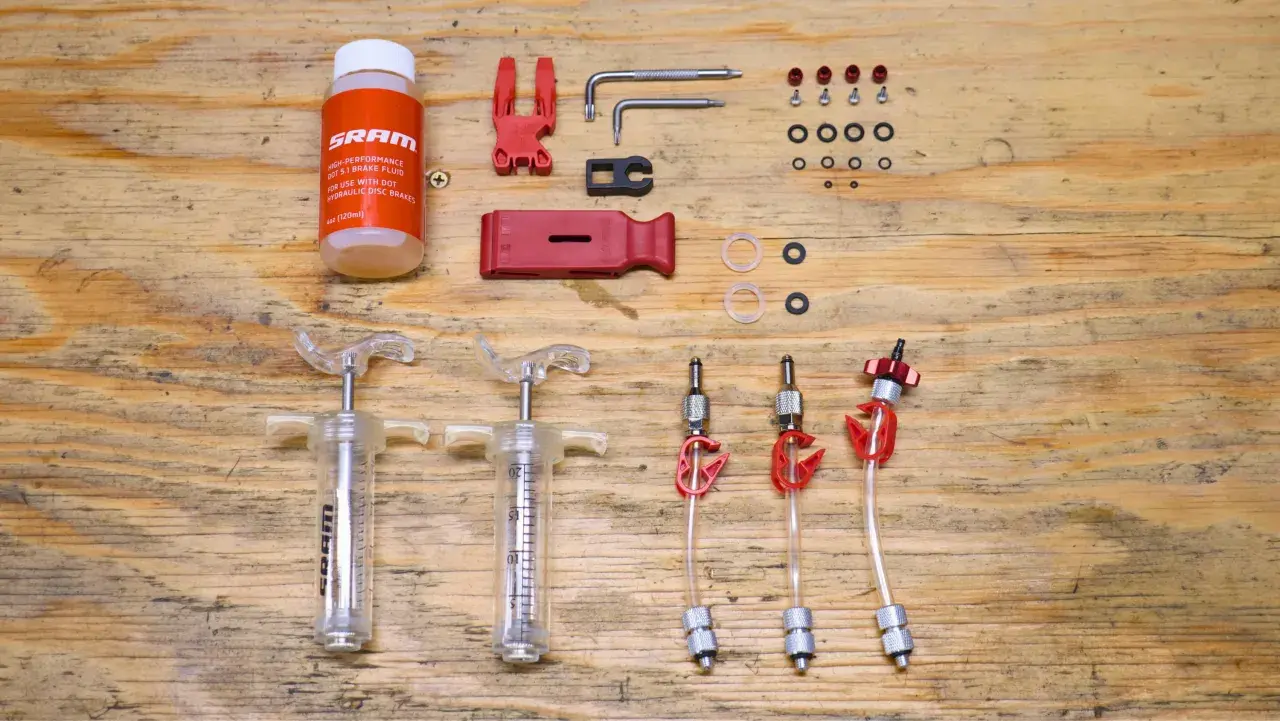
The hardware changes from brand to brand, but the logic is always the same: keep the correct fluid in a clean circuit and give air a path out. Some Shimano systems use a funnel-based one-way bleed, while many DOT-based brakes rely on syringes at both ends; the tools change, but the goal does not. I never assume one bleed kit will suit every brake on the stand.
A standard bleed
- Secure the bike upright, remove the wheel, and fit the correct bleed block or pad spacer.
- Clean the bleed ports and surrounding area so no grit drops into the system.
- Fill the kit with the correct brake fluid for that brake model only.
- Move fluid through the circuit slowly, tapping the hose or caliper if needed to free trapped bubbles.
- Work the lever gently, keep the reservoir at the right level, then close everything up and clean the area thoroughly.
Read Also: Hydraulic Bike Brakes - Top-Up or Bleed?
A full flush
- Start with fresh fluid only and the right kit for the brake brand.
- Push a larger volume through the system until the old fluid has clearly been displaced.
- Watch the colour and consistency if the system design lets you see the return flow.
- Finish with a careful bleed to purge the small bubbles that always seem to hide at the end.
- Inspect the lever feel, hose joints, and caliper after the service, then clean any residue before reinstalling pads and wheel.
The key difference is not the number of syringes or the shape of the lever cup. It is how much old fluid I am willing to push out before I stop, and whether the brake actually needs that deeper reset. From there, the choice becomes much easier once I look at symptoms and service history side by side.
When a bleed is enough and when I would flush instead
Most of the time, I start with the smallest service that can solve the problem. If the lever went soft after a hose was shortened, the caliper was removed, or the bike took a knock, a bleed is usually enough. If the fluid has been sitting for years, gone dark, or picked up contamination, I move straight towards a flush.
| Situation | I would do | Why |
|---|---|---|
| Lever feels spongy after hose work or a crash | Bleed | Air is the likely culprit |
| Fluid is dark, dirty, or overdue for service | Flush | Old fluid is part of the problem |
| Bike has been stored for a long time | Flush, then bleed carefully | The system may have stale fluid and trapped bubbles |
| Contamination event or wrong fluid added | Full service, sometimes with seal inspection | A simple bleed is not enough |
| Consistent fade on long descents | Flush first, then check pads, rotors, and heat management | Fluid may be tired, but heat and pad choice matter too |
SRAM recommends an annual bleed for its DOT brakes, and I would shorten that interval on a bike that lives in wet weather or sees aggressive descents. Mineral oil systems can go longer between services, but “longer” is not the same as “forever”. The moment the lever feel changes, the service interval stops being theoretical.
Why fluid type changes the whole decision
Hope reminds riders that DOT and mineral oil are not interchangeable, and that is the first compatibility rule I check. Shimano and Magura generally use mineral oil systems, while SRAM and Hope generally use DOT-based fluid, but the exact model still wins over any shorthand. If you put the wrong fluid into a system, you are no longer choosing between a flush and a bleed; you are choosing a repair job.
- DOT fluid needs more regular attention because moisture management matters more over time.
- Mineral oil is less sensitive to water absorption, but contamination and trapped air still matter.
- Dedicated tools reduce mistakes, especially if you service different brake brands at home.
- Clean storage matters more than people think; an open syringe or dirty bottle can undo a careful service.
- Wrong-fluid contamination is not something I try to “bleed out” and hope for the best.
For me, the real rule is simple: the bottle has to match the brake, and the process has to match the problem. Once that is in place, cost and convenience become the last two questions, not the first.
What it costs in the UK and when DIY makes sense
In the UK, I would budget roughly £25-£30 for a basic workshop bleed per brake, with the price climbing if the shop has to shorten a hose, replace fittings, or strip a contaminated system. A proper DIY setup usually costs more up front, but a decent kit is still cheaper than paying for multiple workshop visits over the life of a bike.
| Option | Typical UK cost | Time | Best for |
|---|---|---|---|
| DIY bleed with a quality kit | £25-£60 for the kit, plus £10-£25 for fluid | 30-60 minutes once you know the routine | Frequent home mechanics who work cleanly and keep the right fluid on hand |
| Workshop bleed | About £25-£30 per brake | Drop-off to same-day or next-day, depending on the shop | Riders who want the safest and fastest result |
| Deep strip or contamination repair | Higher than a basic bleed quote | Longer | Wrong fluid, leaks, damaged seals, or repeated failure |
For me, the tipping point is not just money but risk. If a bike has expensive pads, a fresh rotor, or a hard-to-bleed lever design, I lean towards the shop unless I have the exact kit and enough time to work cleanly. The cheapest service is the one that does not force you to replace contaminated pads afterwards.
The rule I use before calling it a flush or a bleed
My rule is straightforward. If the problem is air, I bleed. If the fluid is tired, dirty, or contaminated, I flush thoroughly and treat the job as a reset rather than a quick top-up. If the brake still does not feel right after that, I stop blaming the fluid and inspect the hoses, seals, pads, and rotor.
That approach keeps the maintenance honest and the braking consistent, which matters more on a muddy UK trail bike than any label on the bottle. Get the diagnosis right first, then decide how deep the service needs to go.