What matters most when comparing these brake systems
- Air brakes are not a normal bicycle option; they are pneumatic systems used on heavy vehicles, while MTBs usually run hydraulic disc brakes.
- Hydraulic brakes win on modulation and power, which is why they dominate trail, enduro, and downhill bikes.
- Clean rotors and uncontaminated pads make a bigger difference than most riders expect.
- Pad wear, rotor thickness, and lever feel are the first checks I would make before blaming the caliper.
- Muddy UK riding usually favours more durable pad compounds and more frequent inspection.
Why this comparison is not really a bike choice
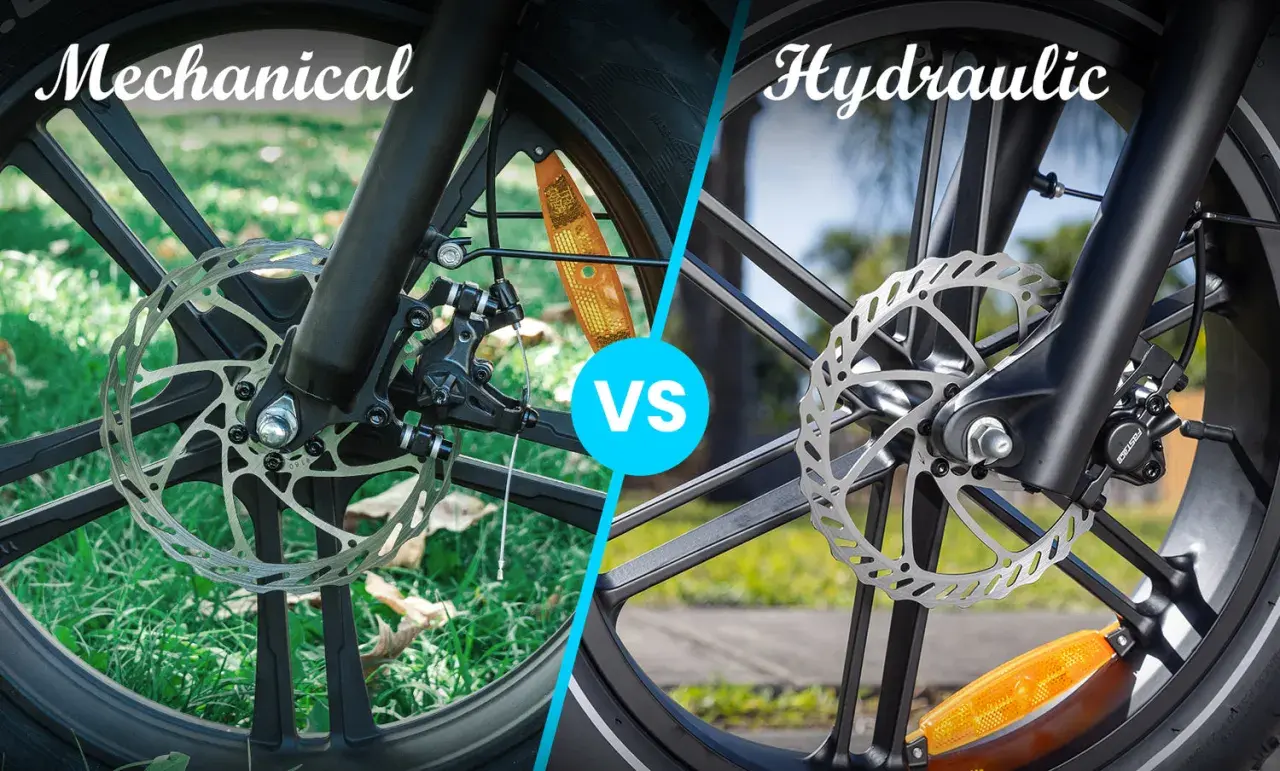
For a bike maintenance article, the first useful distinction is simple: pneumatic brakes and bicycle hydraulic brakes solve different problems. Air systems use compressors and reservoirs in large vehicles; on a mountain bike, that hardware would be bulky, unnecessary, and a poor fit for a compact frame. What most riders actually choose between is hydraulic disc brakes and, on some builds, cable-actuated mechanical discs. That matters because the maintenance schedule, failure mode, and trail-side fixability are completely different.
In other words, the real decision for an off-road rider is not whether to fit air. It is whether to stay with hydraulic brakes, or accept the lower power and simpler servicing of a cable system in exchange for easier field repairs. Once you frame it that way, the rest of the comparison becomes much more practical, and it leads straight into how hydraulic brakes actually do the work.
How a hydraulic disc brake turns lever pressure into stopping power
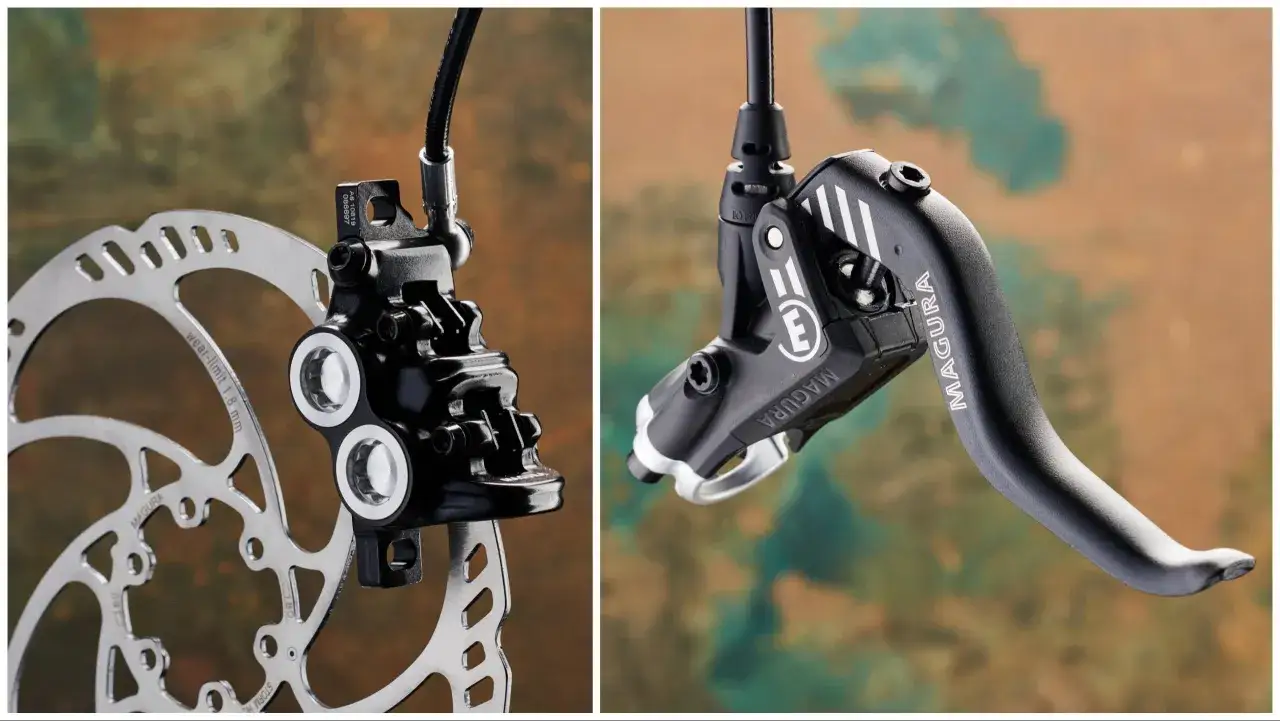
A hydraulic disc brake is beautifully direct: you squeeze the lever, brake fluid moves through the hose, and the caliper pistons push the pads against the rotor. That fluid path is what gives the system its smooth feel and its strong modulation, meaning the ability to fine-tune braking force instead of getting an on-off response. On rough ground, that matters more than most people realise, because traction changes every few metres.
Hydraulic systems also self-adjust as pads wear. As the material gets thinner, the pistons advance to keep the lever feel consistent, which is one reason they stay predictable for longer than many riders expect. Rotor size then becomes the other half of the story: bigger rotors handle heat better, but bigger is not automatically better. On steep descents, the front brake carries a lot of the load, so I generally favour a larger rotor up front rather than simply fitting the largest discs everywhere.
For most trail bikes, the useful question is not “hydraulic or not?” but “how much power, heat management, and lever control do I need for my weight and terrain?” That answer decides whether a bike feels calm and composed on a long descent or starts to run out of bite when the trail gets rough.
The maintenance routine that keeps hydraulic brakes reliable
Hydraulic brakes do not need constant fiddling, but they do need disciplined maintenance. The biggest wins are boring ones: keep the braking surfaces clean, inspect wear before it becomes a problem, and treat changes in lever feel as a warning sign rather than a personality trait of the bike. I see a lot of riders chase bleeding kits when the real problem is a contaminated rotor or pads that are already past their best.
- Keep rotors and pads clean. Use a mild soap-and-water wash for the bike, avoid getting chain lube or degreaser on the braking surfaces, and do not touch rotors with greasy hands. If the pads absorb contamination, performance can fall off fast.
- Check pad thickness. When the friction material is down to 0.5 mm or less, replace it. Waiting longer usually means louder braking, weaker bite, and more heat-related fade on descents.
- Check the rotors too. If a rotor is cracked, warped, visibly damaged, or worn to 1.5 mm or less, it is time to replace it. That limit matters more than cosmetic looks.
- Bleed when the lever tells you to. A spongy feel, extra lever travel, or inconsistent bite usually points to air in the system or degraded fluid. I would bleed sooner on a bike that sees wet winter mileage, bike-park laps, or repeated long descents.
- Reset the pistons properly. If you pull the brake lever with the wheel out, the pistons can move too far in. Use a pad spacer or pad spreader to reset them instead of forcing the issue.
- Bed in new pads and rotors. New braking surfaces need a proper bedding-in process before they give full power and consistent feel.
That routine takes very little time compared with the amount of control it gives back on the trail. Once the system is clean and correctly set up, the next question is why air brakes behave so differently in the first place.
What air brakes do differently in heavy vehicles
Air brakes use compressed air rather than fluid. In practice, that means compressors, reservoirs, valves, and a very different maintenance model built for large vehicles such as HGVs, buses, and trailers. In the UK, that sits firmly in DVSA and heavy-vehicle territory, not bike-workshop territory. The system is designed around pressure storage, warning logic, and a scale of loads that has nothing to do with a mountain bike frame.
| Aspect | Air brakes | Hydraulic bike brakes | What it means on an MTB |
|---|---|---|---|
| Working medium | Compressed air | Brake fluid | Bike levers and calipers are built around fluid, not compressors. |
| Typical use | HGVs, buses, trailers | MTBs, gravel bikes, road bikes | Air brakes are outside normal bike maintenance. |
| Maintenance focus | Compressors, tanks, hoses, moisture, leaks | Pads, rotors, seals, bleeding, contamination | Bike riders should focus on fluid care, not air-system checks. |
| Failure feel | Pressure build-up faults and warning systems | Spongy lever, fade, loss of bite | Different symptoms point to different fixes. |
| Field servicing | Specialist work | Basic pad swaps and occasional bleeding | Hydraulic systems are much more realistic for bikes. |
The important takeaway is not that one system is universally better. It is that air brakes and hydraulic brakes are built for different machines, different loads, and different failure patterns. For off-road cycling, the relevant debate is really hydraulic versus mechanical, and hydraulics remain the performance standard for riders who care about power, control, and heat management.
Which brake setup makes sense for off-road riding
If I’m choosing brakes for a trail bike, I start with terrain and rider weight, not marketing. Hydraulic disc brakes make sense if you ride steep trails, long descents, wet roots, or fast bike-park laps. They also make sense if you want one-finger control and a lever feel that stays consistent as the pads wear. That is why they are still the default choice on serious MTB builds in 2026.
Pad compound is the next decision. Sintered or metal pads are usually the safer pick for mud, grit, and UK winter abuse because they last longer and cope better with heat. Resin or organic pads tend to feel quieter and a little smoother at the lever, but they can fade sooner on long, hot descents. Rotor size follows the same logic: many UK trail bikes are happy with a 180 mm front rotor and a 160 to 180 mm rear rotor, while heavier riders or downhill-focused bikes often benefit from going larger up front.
Mechanical disc brakes still have a place, especially for riders who value simple cable replacement and easy field repair more than ultimate braking feel. I would not choose them for hard, steep riding unless serviceability mattered more than performance. On an MTB, air brakes do not belong in the conversation at all.
The checks I would never skip before a steep or wet ride
Before a big ride, I like to do the same five-minute brake check every time. It catches most problems early, and it is far cheaper than waiting for a brake to misbehave halfway down a wet descent. The routine is basic, but it works.
- Squeeze both levers and listen to the feel. Any mushiness, extra travel, or uneven bite means the system needs attention.
- Look at the pads after muddy or wet rides. If they are close to the wear limit, replace them before the next hard outing.
- Inspect the rotors for scoring, blueing, warping, or contamination.
- Make sure the braking surfaces are clean and dry before you roll out.
- Test both brakes in the car park after any wheel removal, transport, or hose work.
That habit prevents most of the problems riders blame on “bad brakes”. My rule is straightforward: keep the system clean, replace wear items before they reach the limit, and treat any change in lever feel as a maintenance signal, not a quirk. Do that, and hydraulic disc brakes stay predictable in the conditions where off-road riders need them most.