The essentials before you open the system
- A low reservoir is often linked to pad wear, while a spongy lever usually points to air in the system.
- Mineral oil and DOT fluid are not interchangeable. Use the fluid specified for the brake, not a close substitute.
- If the fluid is dark, contaminated, or the hose has been opened or shortened, plan on a bleed rather than a casual top-up.
- If fluid reaches the pads, replace the pads; if it reaches the rotor, clean it immediately.
- On wet UK trails, it pays to check lever feel and pad thickness before a long ride, not after the first steep descent.
What a brake fluid top really means on a hydraulic bike brake
Hydraulic brakes are sealed systems, so fluid does not disappear the way chain lube does. In practice, the level changes because the pads wear, air has entered the system, or a leak has developed. That is why I do not treat a low reservoir as proof that the brake simply needs a splash of fluid.The easiest mistake is to add fluid before checking the pads. As the pads thin out, the pistons sit further out and the reservoir level drops. Fit new pads after a blind top-up and you can end up with an overfull system, a messy overflow, or a lever that feels wrong in the hand.
| What you feel | Likely cause | What I would do |
|---|---|---|
| Spongy or inconsistent lever | Air in the line or caliper | Bleed the brake, do not just add fluid |
| Lever travel gradually increases as pads wear | Normal pad wear | Check pad thickness first, then decide on fluid level |
| Fluid around the lever, hose, or caliper | Leak or loose fitting | Stop riding and fix the leak before anything else |
| Dark or cloudy fluid | Aged or contaminated fluid | Replace the fluid, not just the missing amount |
Once I separate those symptoms, the next decision becomes much clearer: which fluid the brake actually wants.
Choose the correct fluid for your brake system
Here is the part that matters most. Bike hydraulic brakes are not a universal-fluid situation, and guessing is expensive. I always read the lever or caliper marking first, because some brands even offer both DOT and mineral-oil versions in the same product family.
| Brake family | Approved fluid | Practical note |
|---|---|---|
| Shimano mineral oil brakes | Shimano genuine mineral oil | Shimano recommends changing the oil when it becomes noticeably discoloured. |
| SRAM DOT systems | DOT 4 or DOT 5.1 | Use only DOT fluid; mineral oil can damage the system. |
| SRAM mineral oil systems | Maxima Mineral Brake Oil | Do not swap in DOT fluid because the seal chemistry is different. |
| Hope DOT systems | DOT 5.1 or DOT 4 | Hope says you should not need to bleed these more than once a year under normal use. |
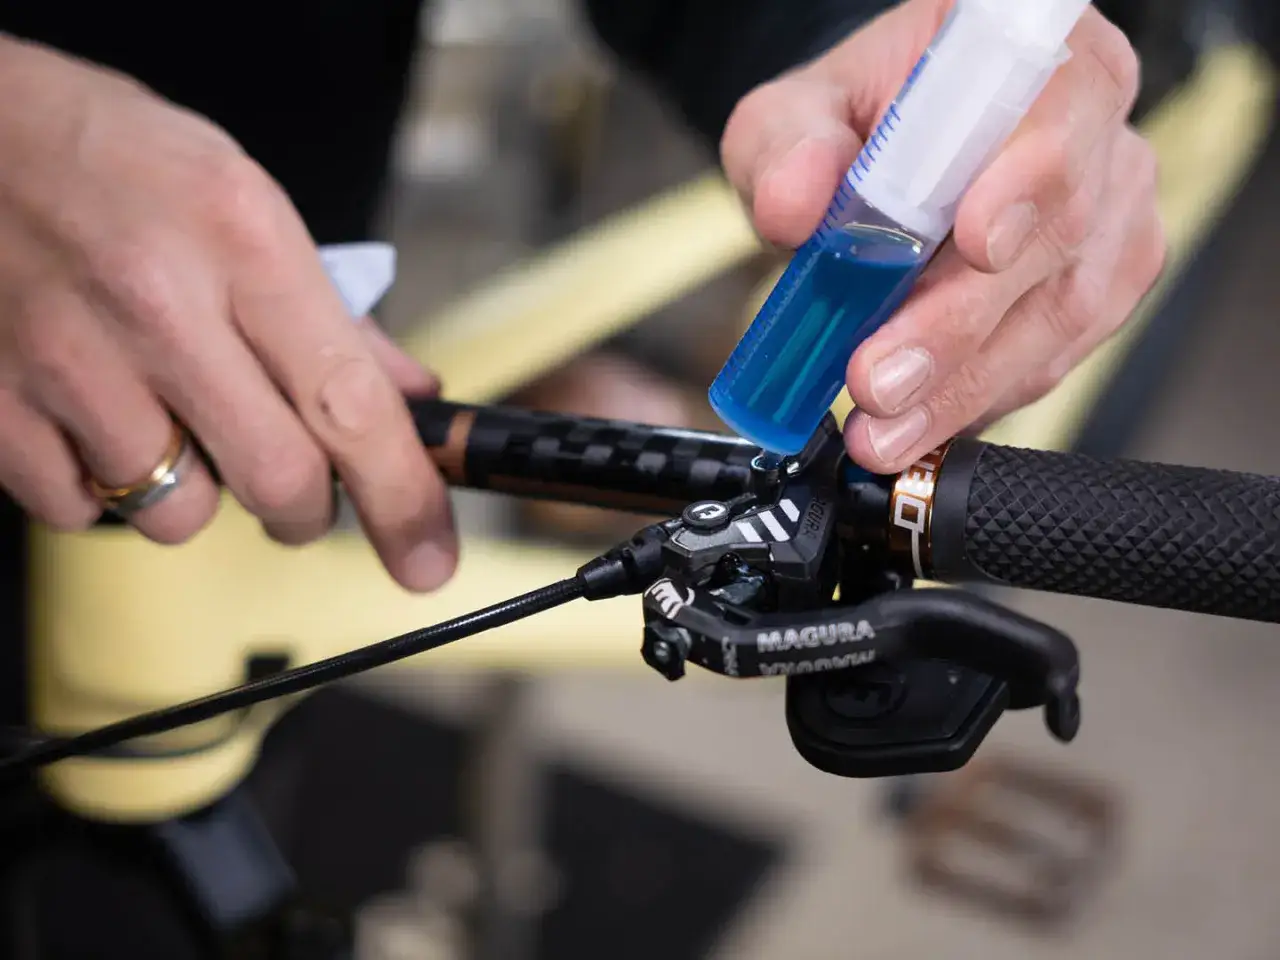
| Magura mineral oil systems | Magura Royal Blood | These are designed around mineral oil, not DOT fluid. |
Never mix fluid types. If the bottle, the service sheet, and the brake markings do not agree, I stop there and check again. The wrong fluid can ruin seals, contaminate pads, and turn a small maintenance job into a full rebuild. That is why the next section is about deciding whether you really need to add fluid at all.
How to tell whether you need a top-up or a bleed
I start with the pads every time. If they are close to the wear limit, the fluid level may simply be following normal piston movement. In that case, I would usually fit new pads first and then recheck the level or bleed the system to the correct setting.
- Top-up only makes sense when the brake is otherwise healthy, the fluid is clean, and the level is low because of pad wear or a small amount of normal system variation.
- A bleed makes sense when the lever feels soft, the bite point moves, the hose has been shortened, or the system has been opened for any reason.
- A full fluid change makes sense when the fluid is dark, contaminated, or old enough that the lever feel has changed even though the pads are still serviceable.
- Stop and inspect first if you can see wetness at a banjo, olive, lever body, or caliper piston.
Shimano recommends changing the oil when the reservoir fluid becomes noticeably discoloured, and that is a better trigger than trying to guess from lever feel alone. Once the fluid is no longer clean, I treat the job as a service, not a top-up. From there, the only sensible approach is to add the right fluid the clean way.
The safe way to add fluid without creating a bigger problem
When I do this job, I work slowly and keep the brake cleaner than the bench. The exact method depends on the model, but the sequence is consistent: prepare the brake, add the correct fluid, purge air, close the system, and test it before the bike goes anywhere near a trail.
- Clean the lever, caliper, and hose area before opening anything.
- Remove the wheel and pads, then fit the correct pad spacer so the pistons cannot move too far out.
- Use the service kit made for your brake family and a fresh, sealed container of the correct fluid.
- Position the lever or bleed port as the manual requires, usually with the lever level so bubbles can rise out.
- Add fluid slowly and gently work the lever until air stops appearing. I avoid frantic pumping because it can keep air in the system.
- Keep the reservoir or syringe from running dry while the system is open.
- Close the port, wipe every trace of fluid, refit the pads and wheel, and then test the lever before riding.
I would use gloves and eye protection on any brake-fluid job. DOT fluid in particular is not something I want on paint, skin, or pads. If you are unsure whether the brake wants a lever-side bleed, a caliper bleed, or both, stop and follow the exact manual for that brake model rather than improvising.
The mistakes that ruin brake feel and contaminate pads
The damage usually comes from small shortcuts, not dramatic failures. Most bad brake jobs I see come down to one of the same errors, and all of them are avoidable.
- Mixing fluid types because the bottle was already on the shelf.
- Using old DOT fluid from an open container instead of fresh fluid from a sealed bottle.
- Letting fluid touch the pads, then hoping the contamination will burn off on the first descent.
- Spilling onto the rotor and not cleaning it immediately with isopropyl alcohol.
- Overfilling the system before new pads are installed, which can create overflow or drag.
- Ignoring a leak because the lever still works for the moment.
If fluid gets onto the pads, I replace them. If it gets onto the rotor, I clean it straight away and then re-test. A brake that feels fine in the stand but weak on the first steep, wet descent is usually telling you that the cleanup was not complete.
What I check after the service on wet UK trails
After the brake is closed up, I do not trust the lever until it has passed a few real checks. The lever should feel firm, return consistently, and stay that way after a few hard pulls. There should be no seepage overnight, no sudden bite-point drift, and no dragging that was not there before the service.
- Bed in new pads with a series of controlled stops; Shimano recommends repeating the process at least 20 times for both brakes, which is a good reminder that new friction material needs a proper bedding-in period.
- Check the pad thickness again after a muddy ride, because UK grit and water can eat through pads faster than many riders expect.
- Inspect the hose, banjo, and lever body after the first ride, especially if the system was opened or the hose was shortened.
- For hard-used DOT brakes, an annual bleed is a sensible baseline; on mineral-oil systems, I pay more attention to feel and fluid condition than to the calendar.