I treat bike maintenance as a small routine that keeps a bike quiet, safe, and predictable. The real win is not a workshop marathon; it is knowing what to check before every ride, what to clean after a muddy loop, and which signs mean a part is close to failure. For UK riding, especially on wet lanes and trail centres, that habit pays off quickly because grit, water, and winter salt punish moving parts faster than most riders expect.
The fastest way to keep a bike reliable is to check air, brakes, chain, and wear points on a fixed rhythm
- Before every ride, I do a short ABC-style check: air, brakes, chain.
- After wet or muddy rides, I clean and dry the drivetrain before grit starts chewing through it.
- Tyres, brake pads, chain wear, and axle security are the first places I look for trouble.
- MTB suspension and pivot bearings need extra attention because mud and wash water reach places that are easy to ignore.
- Replacing a worn chain early is one of the cheapest ways to avoid a much larger drivetrain bill.
- If a problem affects steering, braking, or wheel security, it is not a “later” job.

The fastest way to keep a bike reliable is to check the same things every time
Before I ride, I use a short ABC-style check: air, brakes, chain. It takes about two minutes and catches the problems that matter most. I squeeze both brake levers, look for tyre cuts or low pressure, spin the cranks, and make sure the wheels are secure in the frame or fork.
- Air means tyre pressure and tyre condition. A soft tyre can feel vague on the trail long before it becomes obviously flat.
- Brakes means lever feel, pad life, and rotor cleanliness. If the lever suddenly feels spongy or the bite changes, I stop and inspect.
- Chain means checking for dryness, rust, tight links, or obvious wear. A neglected chain is usually the first part to complain.
- Axles and quick releases need a quick visual and physical check. A loose wheel is never a minor issue.
On a trail bike, I also bounce the bike lightly and listen for anything unusual. A click, knock, or rub is often the earliest warning that something has shifted. Once the safety basics are covered, I move straight to cleaning, because dirt left on the bike is what turns a small issue into accelerated wear.
Clean it without washing the life out of it
For a trail bike, cleaning is about removing grit, not making the frame look showroom-perfect. I use a bucket, a soft brush, a sponge, and a rag. If the bike is covered in wet mud, I rinse it gently first, then clean the frame, wheels, chain, chainrings, cassette, and derailleur pulleys before drying everything thoroughly.
| Good habit | Why I use it |
|---|---|
| Low-pressure rinse | It removes mud without forcing water into bearings. |
| Separate brush for the drivetrain | It keeps oily grime off the frame and brake surfaces. |
| Dry the bike before storage | It slows corrosion, especially in damp UK garages. |
| Keep degreaser off pads and rotors | Disc brakes are unforgiving once contaminated. |
I avoid pressure washers. They can feel efficient, but they push water and grit into hubs, bottom brackets, headset bearings, and suspension pivots. After a wash, I always wipe the chain dry before applying lube, because lubricant on top of water just traps dirt. A clean drivetrain still wears out, so the next job is knowing how to read it before it starts eating itself.
Keep the drivetrain quiet, not just shiny
The chain is the cheapest wearing part on the bike, which is exactly why I watch it closely. A worn chain does not just feel rough; it starts damaging the cassette and chainrings, and that is where the bill rises fast. I check chain wear regularly with a gauge rather than guessing from how it looks.
Replace the chain before the cassette is punished
On many modern drivetrains, a chain checker will flag replacement around 0.5% wear, while wider-range or older systems often tolerate closer to 0.75%. I do not treat those numbers as universal law, because the safest threshold depends on the drivetrain maker, but they are a very useful warning line. If the bike starts skipping under load or the shifting goes vague on clean cassette teeth, the chain has probably stayed on too long.
Read Also: Hydraulic Brake Bleed - Cap On or Off? Pro Guide
Choose lubrication for the conditions
For UK riding, wet and dry lubes are not interchangeable. Wet lube stays in place in rain and winter slop, but it attracts more grime; dry lube stays cleaner in summer, but it needs reapplication sooner after wet rides. My rule is simple: use the lightest lube that survives the conditions you actually ride in, then wipe off the excess so the chain is coated, not dripping.
- Reapply after rain, a wash, or a muddy ride.
- Use a chain checker every few weeks if you ride often.
- Shift cleanly and avoid grinding in the hardest gear combination all the time.
- Listen for a dry, rasping chain sound; it is usually the first complaint before performance drops.
Once the drivetrain is sorted, the next wear points I pay attention to are tyres and brakes, because those are the parts that decide whether the bike feels secure or nervy on the trail.
Brakes and tyres do the safety work, so they deserve close attention
Tyres and brakes are the two systems I never leave to luck. A tyre can look fine until it is soft, cracked, or cut on the sidewall, and brakes can feel acceptable until pad material is almost gone or the rotor has been contaminated with oil.
| What I check | What I want to see | When to act |
|---|---|---|
| Tyre pressure | Firm enough for support, low enough for grip | Before every ride and after temperature swings |
| Tyre condition | No sidewall cuts, bulges, or exposed casing | Replace at the first sign of structural damage |
| Brake pads | Enough friction material left, no glazing or contamination | Replace before the pad backing gets close to the rotor |
| Lever feel | Consistent bite and no spongy travel | Investigate immediately if feel changes |
On disc brakes, I keep fingerprints, chain lube, and degreaser away from the rotor and pads. If contamination happens, I clean the rotor with the correct brake cleaner or isopropyl alcohol and replace pads if they have soaked up oil; once pads are contaminated, they rarely come back to full performance. Some Shimano manuals specify a minimum pad thickness of 0.5 mm on certain systems, and I follow the maker’s limit rather than guessing.
If you run tubeless, check sealant every two to four months. In hot storage or very dry weather it can dry out sooner, and in cold, wet conditions it can still lose its sealing edge without warning. That one check saves more rides than most riders expect. With the contact points handled, the last big maintenance load on a trail bike is the muddy, moving hardware that sits out of sight and takes the beating.
Trail bikes need extra care where mud and bearings meet
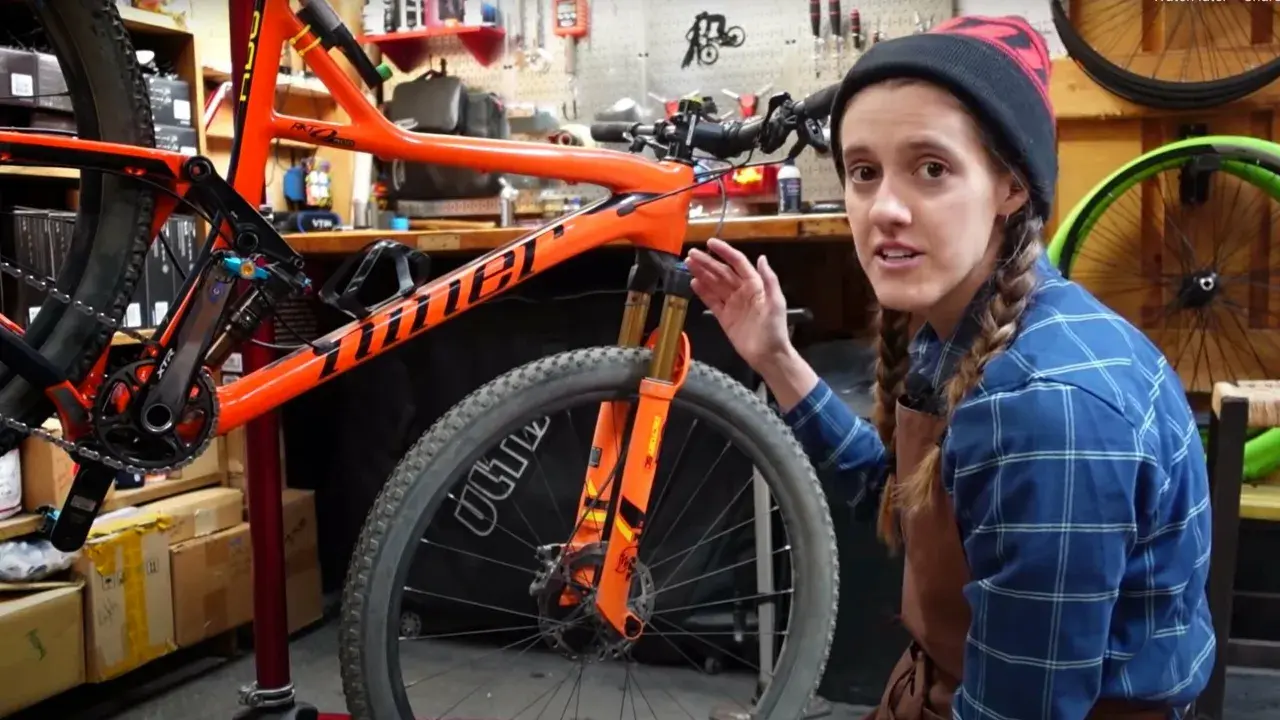
MTB care is harsher than road-bike care because mud gets everywhere and suspension encourages riders to think the bike is tougher than it is. I am not gentle here, but I am deliberate. After a filthy ride, I wipe the suspension stanchions clean, check the fork seals for grit, and look for play in the headset, bottom bracket, and suspension pivots.
Suspension service is the part many riders delay too long. Many forks and shocks are specified in service hours rather than months, and the lower-leg or air-can service usually arrives sooner than people expect. I treat the exact interval in the manual as the real schedule, not as a suggestion.
- Wipe stanchions before and after storage so dirt does not get dragged past the seals.
- Check pivots for knocking or creaking when you rock the bike side to side.
- Inspect the headset by holding the front brake and gently rocking the bike forward.
- Listen for bottom bracket noise under load, especially after wash days.
- Book a service if a bearing develops play; adjustment only hides the symptom for so long.
That kind of attention matters because muddy hours wear parts unevenly, and the damage often shows up in expensive places later. From there, the natural question is when a home check is enough and when the bike needs a bench, a torque wrench, or a mechanic.
The maintenance rhythm that saves the most money over a season
I prefer a simple routine with clear checkpoints, because vague promises to “look after the bike” do not survive a busy week. This rhythm works well for most riders in the UK, especially if they split time between wet commutes, trail centres, and weekend woodland loops.
| Routine | What I do | Typical time | Why it matters |
|---|---|---|---|
| Before every ride | Air, brakes, chain, wheel security, visible damage | 2-3 minutes | Catches unsafe problems early |
| After wet or muddy rides | Gentle rinse, dry, relube, wipe suspension | 10-20 minutes | Stops grit and water from staying on the bike |
| Monthly or every few rides | Check bolt torque, chain wear, pad thickness, wheel true, sealant level | 20-40 minutes | Finds wear before it becomes failure |
| Seasonal or by service hours | Suspension, bearings, brake bleed, cable or hose inspection | Workshop level | Restores performance and protects expensive parts |
I adjust that rhythm upward in winter, because rain and grit accelerate wear, and downward only in genuinely dry conditions. If a bike sees hard trail use, I would rather service it slightly early than discover that a small delay has turned into a new cassette, a set of brake pads, and a weekend lost to mechanical noise.
There are also a few habits that make the whole system cheaper to own: store the bike dry, keep a small torque wrench handy, log chain wear instead of guessing, and do not ride through warning signs just because the bike still moves. That is the version of maintenance that actually pays back.
The habits that keep a trail bike cheaper to own
The best riders I know are not the ones who strip a bike down every week. They are the ones who notice change early. A quiet creak, a chain that no longer shifts crisply, a rotor that suddenly feels touchy, or a wheel that develops the faintest side-to-side play is usually the first signal that a small job is about to become a bigger one.
- Replace wear items before they damage expensive parts.
- Use the manufacturer’s torque and service guidance on anything safety-critical.
- Keep consumables like pads, chain lube, and sealant on hand so repairs happen on time.
- Treat mud, salt, and pressure washing as the main enemies, not cosmetic dirt.
If I had to reduce the whole topic to one rule, it would be this: inspect little and often, clean with restraint, and replace worn parts before they start taking neighbours with them. That approach keeps the bike dependable, keeps the ride quieter, and usually keeps the repair bill in a range you can live with.