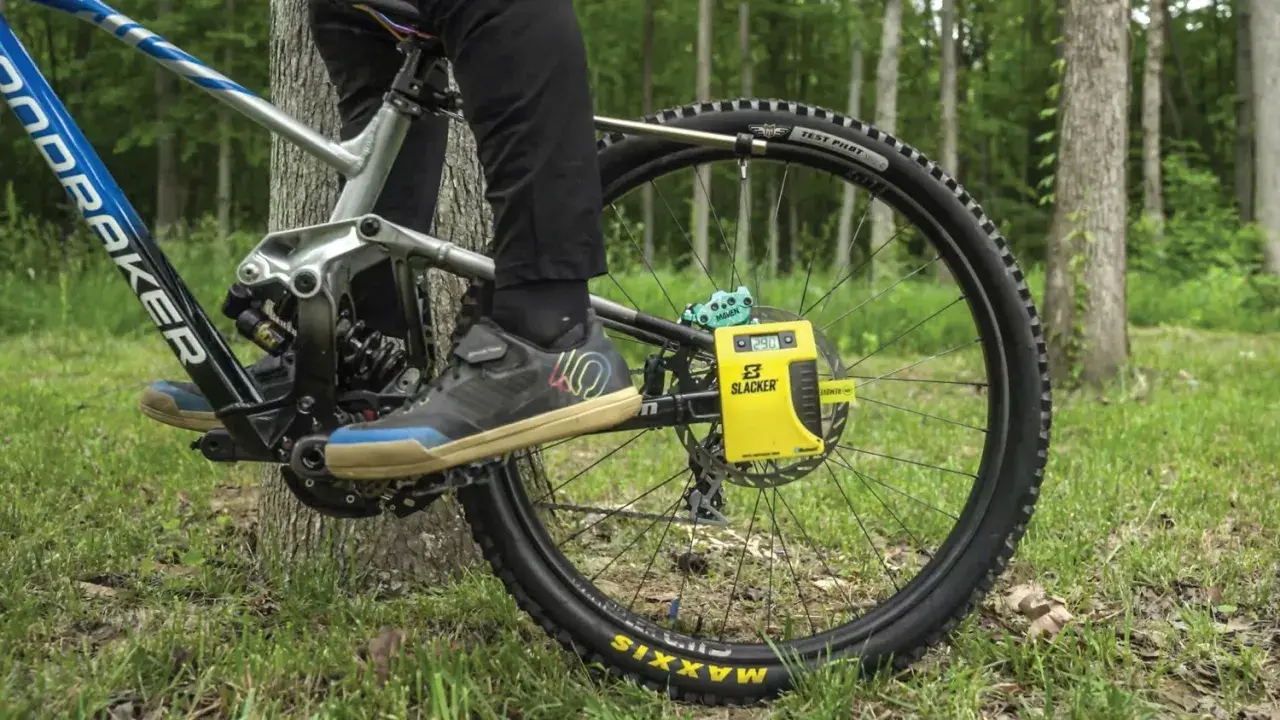
Getting rear shock measurements right matters because the frame, linkage and shock have to agree on more than just travel. The useful numbers are eye-to-eye length, stroke, mounting hardware and mount style, plus the clearance around the frame. In this guide, I break down what each dimension means, how to verify it, and where riders usually go wrong.
The key measurements to read before you order anything
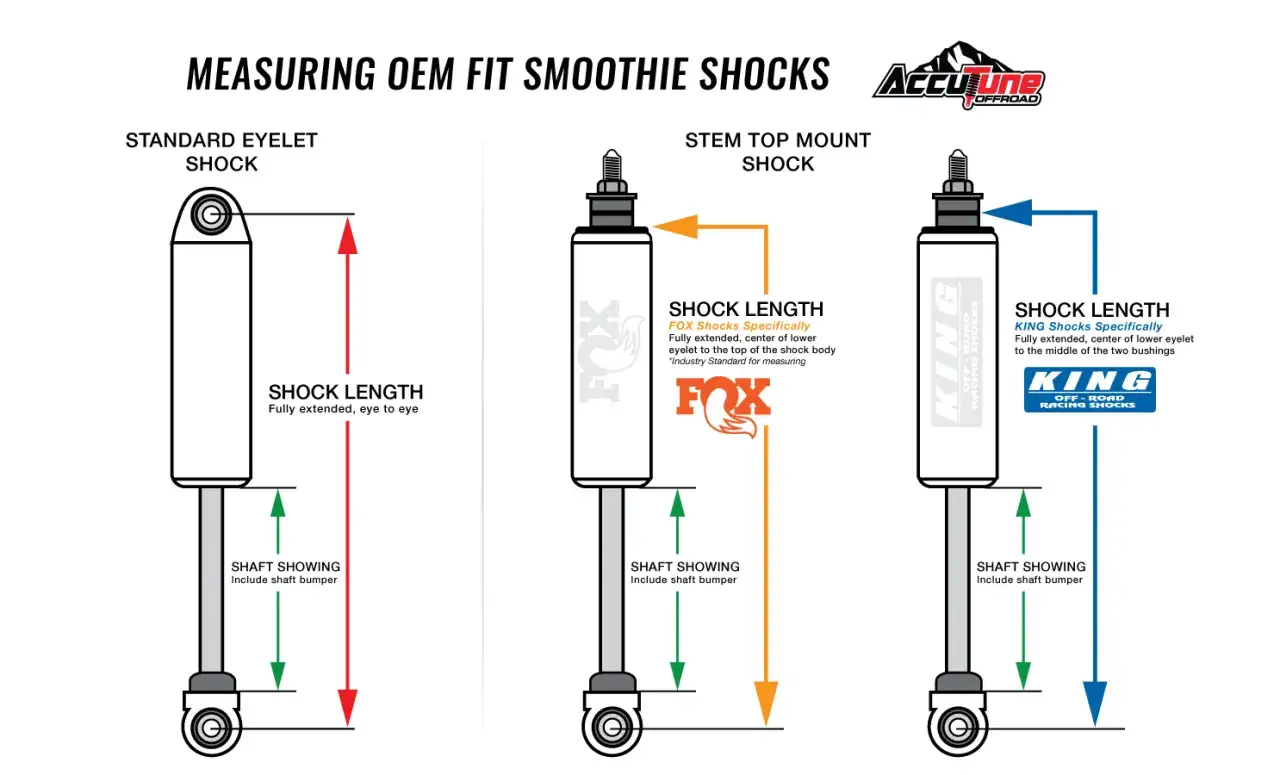
- Eye-to-eye is the centre-to-centre length between the two mounting points.
- Stroke is the shock’s compression range, and it is not the same as rear wheel travel.
- Trunnion and standard eyelets are different mounting systems and are not interchangeable.
- Hardware width and bolt diameter often decide whether a shock actually fits the frame.
- Most modern MTB shocks are specified in millimetres, often in the format 210 x 52.5 mm.
- A 2.5 mm stroke mismatch can be enough to create clearance or geometry problems.
What the numbers on a shock actually tell you
In the UK, I treat millimetres as the only language that matters here. A shock listed as 210 x 52.5 mm means 210 mm eye-to-eye and 52.5 mm stroke, which is the basic format used across most modern mountain bike catalogues. The first number tells you how long the shock is between mounting centres; the second tells you how far it can compress.
That distinction matters because wheel travel is not the same thing as shock stroke. The rear axle moves through a linkage, so the frame can deliver 130 mm, 150 mm or even more of wheel travel from a much shorter shock stroke. I still see riders mix those two up, and it leads to bad orders and avoidable returns.
| Measurement | What it means | Why I care |
|---|---|---|
| Eye-to-eye | Distance from the centre of one mount to the centre of the other | It sets the shock’s installed length in the frame |
| Stroke | Maximum shaft travel from top-out to full compression | It affects usable travel and frame clearance |
| Mount style | Standard, trunnion or bearing mount | It decides how the shock attaches to the frame |
| Hardware width and bolt diameter | The size of the reducer hardware in the eyelet | It decides whether the shock can actually bolt into the frame |
| Clearance | Space around the body, spring and reservoir | It prevents contact at full compression |
Most importantly, the same eye-to-eye length can come with different stroke lengths, and those small differences matter. Modern metric shocks often change in 2.5 mm steps, so a 50 mm stroke and a 52.5 mm stroke are not a casual swap. Once you can read the numbers, measuring them becomes much easier.
How I check a rear shock size without guessing
I never start by assuming the shock on the bike is the right one. I start with the frame maker’s published spec, then I use the shock itself to confirm the details. That is the safest approach because different frame sizes, model years and trim levels can use different shocks even when the bike name looks identical.
- Check the bike brand’s specification for your exact model, frame size and year.
- If the shock is removed, measure centre-to-centre between the two mounting points with digital calipers.
- Read the printed size on the shock body or model sheet, but treat it as a cross-check rather than the only source.
- Note the hardware width and bolt diameter, because the eyelet can be the wrong size even when the shock length is correct.
- Confirm whether the frame uses a standard mount or trunnion mount before you order anything.
When I have to measure on the bench, I use calipers rather than a ruler. The difference between two nearby stroke sizes is often only 2.5 mm, and that is small enough to miss if you are working by eye. If you are unsure, a shop can verify the size quickly and save you from buying the wrong hardware.
Why the mount style matters as much as the size
Size alone does not guarantee fit. A shock can have the right eye-to-eye and stroke and still be the wrong part if the mounting style is off. In practice, I treat standard eyelets, trunnion eyelets and bearing mounts as three separate fitment worlds.
| Mount style | What it usually means | What I check |
|---|---|---|
| Standard eyelet | Common on many trail and enduro bikes | Hardware width, bolt diameter and whether bushings are required |
| Trunnion | The shock mounts by the body end and usually has a shorter overall package | Whether the frame is designed for that exact trunnion size |
| Bearing mount | A bearing is built into the mount instead of a basic bushing setup | Frame approval and the correct mounting dimensions |
The important point is simple: you cannot turn a standard shock into a trunnion shock just by changing a reducer kit, and you should not assume bearing mounts are automatically compatible either. The frame decides the mount style, not the rider. Once that is clear, the next question is whether the stroke itself is safe for the frame.
Why stroke length is the number that can quietly cause problems
Stroke is the measurement that causes the most expensive mistakes. A longer stroke may sound like free travel, but the linkage decides how that travel is delivered, and a few extra millimetres can be enough to make the tyre hit the seatstay or let the links over-rotate. That is why I never treat stroke as a number to experiment with unless the frame maker explicitly approves it.
The risk is not limited to a visible clearance issue in the workshop. At full compression under load, the frame can flex more than it does when the bike is stationary. That is how a setup that looks fine on the stand can still damage the frame on trail. In the worst case, the wrong stroke can void the bike warranty and create a safety problem, not just a fitment annoyance.
- Too much stroke can cause tyre-to-frame contact.
- Too much stroke can over-rotate the linkage.
- Too much stroke can stress frame mounts and pivots.
- Too little stroke usually means less usable travel and a different ride feel.
This is also where the small 2.5 mm metric steps matter. I would rather match the exact approved size than chase a little extra travel that the frame was never designed to use. After that safety check, the next thing I look at is packaging space around the shock body itself.
Air, coil and reservoir clearance are part of the measurement too
Not every shock that fits on paper fits in the frame once you add real hardware. Air shocks are generally more compact, while coil shocks need room for the spring diameter and sometimes a piggyback reservoir. If a frame is tight around the seat tube, bottle cage mounts or swingarm, those extra millimetres can matter more than the spec sheet suggests.
When I assess clearance, I look beyond the main body dimensions:
- Does the spring clear the seat tube, linkage and frame bridge at full compression?
- Does a piggyback reservoir leave room for a bottle cage, frame bag or cable routing?
- Will the shock touch the frame under compression, rotation or lateral flex?
- Does the frame maker approve both air and coil options for that exact model?
This is where many upgrades go wrong. Riders see that a bike can run an air shock and assume a coil will fit as well, or they swap to a reservoir shock without checking the extra body length. If the frame has room, a coil or reservoir shock can be excellent. If it does not, the best shock in the world is still the wrong one. The final step is a simple checklist before money changes hands.
The fitment check I use before ordering a replacement shock
- Match the exact frame model, frame size and model year.
- Match the eye-to-eye length and stroke exactly.
- Match the mount style, whether that is standard, trunnion or bearing.
- Match the hardware width and bolt diameter to the frame.
- Check full-compression clearance for the tyre, linkage, seatstay and any reservoir or coil spring.
- Confirm the tune, spring rate and volume setup only after the physical fit is correct.
If one figure is missing, I go back to the bike maker’s spec sheet or ask a reputable shop before I guess. That order of operations is what keeps a small measurement job from becoming an expensive suspension mistake, and it is the cleanest way to think about rear suspension fitment in practice.