The key facts that matter before you ride one
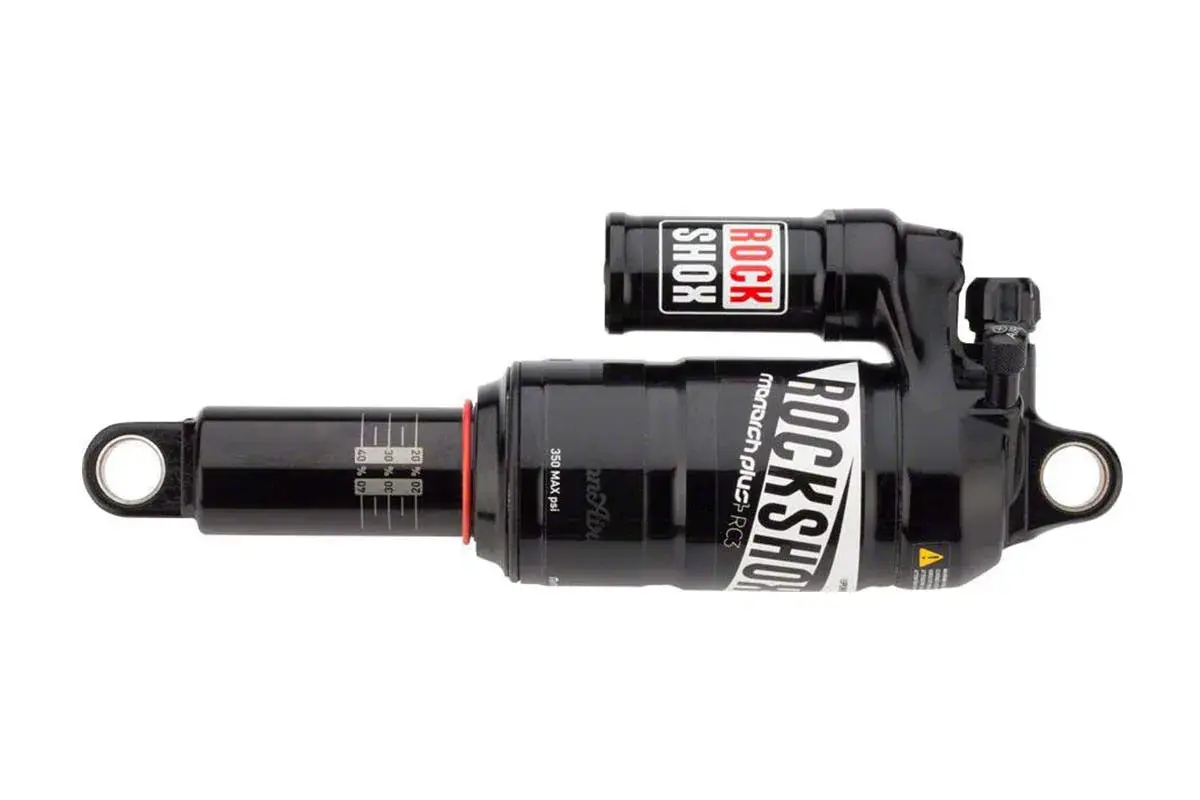
- The RC3 version uses external rebound adjustment plus a three-position compression lever, so setup is straightforward.
- RockShox listed a range of sizes, from 190x51 up to 216x63, but frame compatibility still matters more than the shock itself.
- A good starting point is to set air pressure close to your dressed rider weight in pounds, then tune by sag.
- Solo Air versions aim for about 25% sag, while DebonAir versions are closer to 30%.
- RockShox support recommends a 50-hour air-can service and a 100-hour air-can plus damper service for this family of shocks.
- For most riders today, it makes the most sense on older trail and enduro frames, especially when you want a simple, dependable tune.
What this rear shock was designed to do
This shock was built for riders who wanted more support than a basic lightweight trail unit, but without jumping all the way to a coil. RockShox positioned it as a lightweight air shock with a damper character borrowed from its bigger-mountain designs, which explains why it feels more composed than a simple XC rear shock when you start hitting roots, chatter, and repeated impacts.
In practical terms, that means the shock is happiest on bikes that see real trail use: climbing, descending, braking bumps, and the kind of uneven ground where a rear end needs to stay active without turning vague. Later model listings put it at roughly 355 g for a 216x63 version with a standard air can and no hardware, which is still respectably light for a shock with this much support. I would not call it a modern “set it and forget it” platform, but it does a good job when the frame and tune are right. That leads straight into how it feels once the trail gets rough.
How it feels on the trail
The best way to think about the RC3 damping layout is simple: Open for descending, Pedal for mixed terrain, Lock for smoother or more efficient climbing. It is not a shock that tries to do everything through complex adjustability. Instead, it gives you three usable positions and asks you to make the setup work around the bike you actually ride.
| Mode | What it does | When I would use it | Trade-off |
|---|---|---|---|
| Open | Most traction and sensitivity | Rocky descents, root webs, rough UK trail centres, technical singletrack | More pedal bob when you are pushing hard |
| Pedal | Middle-ground support | Rolling terrain, punchy climbs, all-day trail riding | Less plush than Open |
| Lock | Firmest support | Smoother fire roads, seated efforts, short sprints | Not a true rigid lockout, and it can feel harsh on broken ground |
What I like about this layout is that it forces a realistic decision. If a bike pedals poorly in Open, I would usually reach for Pedal first, not Lock. If Lock becomes the only position that makes the bike feel efficient, the real issue is often spring rate, sag, or frame kinematics rather than the damper itself. That is why fit matters so much, which is the next thing to check.
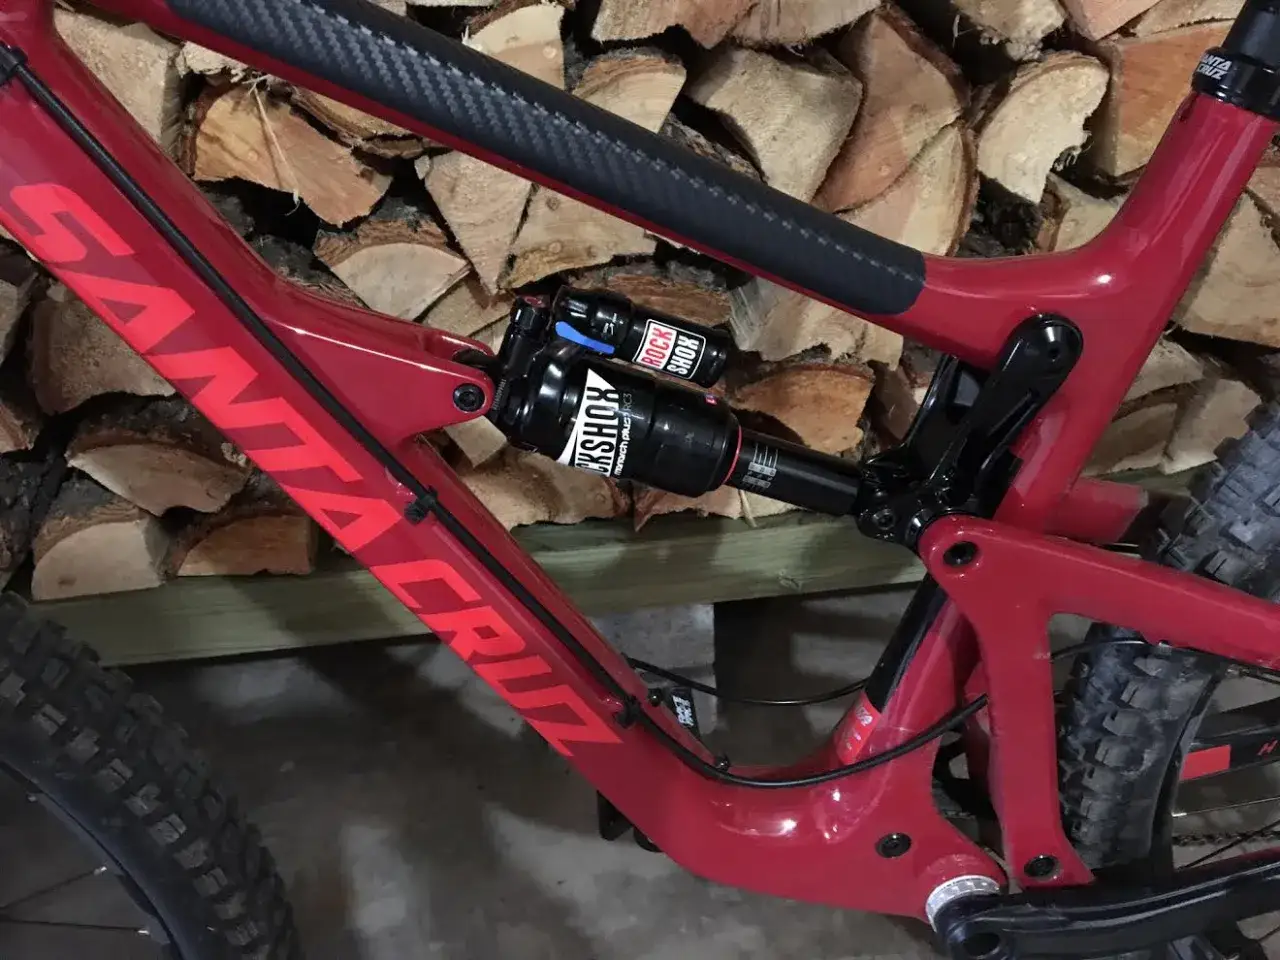
Fit and compatibility are the real make-or-break checks
Before you spend time tuning or servicing one of these, confirm that the shock actually belongs on the frame. RockShox listed a fairly wide set of sizes, but the numbers only work if the frame, mounting hardware, and leverage curve are a match.
| Common size | Typical use case | My note |
|---|---|---|
| 190x51 | Shorter-travel trail or older compact frames | Common on older trail bikes, but not something I would assume fits anything else |
| 197x48 | Compact rear triangles and niche frame designs | Worth checking carefully because stroke length matters as much as eye-to-eye |
| 200x51 / 200x57 | Trail and all-mountain bikes | A very common range, but hardware and clearance still need checking |
| 210x60 / 216x57 / 216x63 | Longer-travel enduro frames | These are the sizes I would expect on more aggressive chassis |
Two checks matter more than the model badge. First, confirm the mounting hardware and eyelet style, because some versions use different eyelet solutions and not every frame wants the same hardware. Second, check full-compression clearance with the frame maker, especially if the bike uses a yoke or a tight linkage area. RockShox’s own service pages explicitly tell riders to check aftermarket compatibility with the frame manufacturer, and I would treat that as non-negotiable. Once the fit is correct, setup becomes much easier.
How to set sag, rebound, and compression without guessing
I always set the spring first, then rebound, then compression. If you do it in the wrong order, you end up chasing a bad baseline and confusing support with harshness. For this shock, a clean starting point is to run the compression lever fully open or in its minimum setting, set rebound near the middle of its usable range, and then bring the air spring to a sensible starting pressure.
RockShox support recommends a simple starting method: use your total dressed rider weight in pounds as the initial PSI reading, then compress the shock once to equalise pressure and measure sag. The target depends on the air can. Solo Air versions aim for about 25% sag, while DebonAir versions aim for about 30%. RockShox also notes that sag can be adjusted by roughly +/-5% to suit preference, which is useful if your frame or riding style sits outside the average.
| What you notice on trail | First adjustment I would make | Why |
|---|---|---|
| The bike sits too deep, pedals strike, or the rear end feels low | Add 5 PSI | More spring support reduces sag and restores ride height |
| The shock feels too firm or barely uses travel | Remove 5 PSI | Less pressure lets the air spring move more freely |
| The shock kicks back quickly after bumps | Add 1 to 2 clicks of rebound damping | Slower rebound keeps the rear wheel calmer and improves control |
| The shock feels dead, packs down, or fails to recover between hits | Remove 1 to 2 clicks of rebound damping | Faster rebound helps the rear wheel return to travel before the next impact |
| Climbing bob is distracting | Move from Open to Pedal before reaching for Lock | Pedal often gives enough support without over-firming the ride |
The useful part here is restraint. I would rather make one small change at a time and take a short ride than stack air pressure, rebound, and compression changes all at once. When the spring rate is right, the lever positions start to make sense instead of feeling like a workaround. That also tells you how often the shock needs proper service, which is where older units often fall behind.
Maintenance that actually keeps it alive
This is where a lot of older rear shocks become unreliable. RockShox support says rear shocks need regular service, with a 50-ride-hour air-can service and a 100-ride-hour air-can plus damper service for the Monarch and Monarch Plus family. The service manual also says seals and damping fluid should be replaced 100 hours or annually. In a wet, gritty UK riding season, I would treat those intervals as the ceiling rather than the goal.| Interval | What should happen | Why it matters |
|---|---|---|
| 50 ride hours | Air-can service | Restores small-bump sensitivity and reduces contamination |
| 100 ride hours | Air-can and damper service | Keeps damping consistent and prevents the shock from feeling vague or sticky |
| 100 hours or annually | Replace seals and damping fluid | Protects the internal components and keeps wear under control |
If the shock will not return to full extension, I would stop there and hand it to a qualified suspension mechanic. That is not a “clean it and hope for the best” situation. It is also the point where buying used hardware becomes a lot more expensive than it first looks. Which is why the next comparison matters: should you keep one, or move to something newer?
How I would compare it with newer RockShox rear shocks
If I were choosing between keeping this shock and upgrading to a newer RockShox platform, I would start with the frame, not the catalogue. Newer Deluxe and Super Deluxe shocks usually give you more tuning freedom and better alignment with modern frame standards, but they also add more choices and more ways to get the setup wrong. The RC3 layout is simpler, and that simplicity still has value.
| Question | RC3 answer | Newer RockShox answer |
|---|---|---|
| How much adjustment do I really need? | Three compression positions are easy to understand | More knobs, more air-can options, more fine-tuning |
| Do I want a light, straightforward rear shock? | Yes, if the frame was designed for it | Yes, but often with more complexity |
| Is this a good fit for an older bike build? | Often yes | Sometimes, but not always without frame-specific checks |
| What if I want the latest tuning flexibility? | Limited | Clearly better |
My short version is this: if the bike already suits the shock, and the damping still works properly after service, there is no automatic reason to replace it. I would upgrade only when I need better frame compatibility, more mid-stroke control, or a wider tuning range than the RC3 layout can give. That brings us to the final thing I would inspect before spending money on one in 2026.
The checks I would make before buying one in 2026
Used rear shocks can look fine and still need immediate work. Before I would buy one, I would check the air can for oil residue, cycle the compression lever through all positions, and make sure the shock returns smoothly to full extension. I would also inspect the eyelet bushings for play, confirm the exact size stamped on the body, and verify that the shock actually matches the frame I plan to use it on.
- Look for leaks around the air can and damper body after a short ride, not just after a wipe-down.
- Check the lever feel so you know Open, Pedal, and Lock are all distinct.
- Inspect the bushings for lateral movement or knocking.
- Confirm service history and budget for a refresh if the seller cannot prove maintenance.
- Match the frame first, then the tune, then the price.
If those boxes are ticked, the shock can still make a very sensible choice for the right bike. I would buy it as a proven, straightforward rear shock for an older trail or enduro frame, not as a modern do-everything answer, and that is exactly the right way to judge it.