Hydraulic disc brakes are one of the best upgrades on an MTB, but they only stay sharp if the system is clean, the fluid is healthy, and the pads and rotors are treated as a matched pair. The workshop slang people sometimes call juice brakes usually points to that hydraulic setup, often the older Avid Juicy family, and the practical questions are always the same: what it is, why the lever feels odd, and what maintenance actually matters on the trail.
The practical version of hydraulic brake maintenance
- Hydraulic brakes use fluid, not cables, to transfer lever force to the caliper.
- A spongy lever usually points to air or tired fluid; weak braking often starts with worn pads, contamination, or poor bed-in.
- Inspect pads monthly, and more often in wet or muddy UK conditions where grit wears them faster.
- Use the correct fluid and bleed kit for the brake family. DOT and mineral oil are not interchangeable.
- New pads and rotors need a proper bed-in before you judge power or noise.
- On some SRAM systems, pads are due at 3 mm or less total thickness, and rotor replacement depends on the minimum stamped on the disc.
What riders usually mean by hydraulic brakes
In practice, the phrase points to a brake that uses fluid to move pistons in the caliper. The lever feel is smoother, the power is easier to modulate, and you usually get better control on steep, loose, or muddy ground than you do with a basic cable brake.
The label matters because maintenance choices depend on the brake family. DOT and mineral oil are not interchangeable, pad shapes vary, and older Avid Juicy setups use different service parts from many modern systems. I always identify the brake first, then I decide whether the problem is fluid, pads, rotors, or contamination.
If a rider hands me an older bike and says the brakes are “juicy”, I do not start guessing. I check the brake family, the fluid type, and the pad standard first, because that prevents the most common workshop mistake: buying the wrong parts and servicing the system in the wrong way. Once that is clear, the next step is understanding how the brake actually creates stopping power.
How the system works on the trail
A hydraulic brake turns finger pressure into clamping force through a closed fluid circuit. The lever pushes a piston, the fluid travels through the hose, and the caliper pistons squeeze the pads against the rotor. That is why a good hydraulic brake can feel light at the lever while still delivering serious stopping power.
| Feature | Hydraulic disc brakes | Mechanical disc brakes |
|---|---|---|
| Power | Higher and more consistent, especially on long descents | Usually lower and more dependent on cable setup |
| Modulation | Smoother, easier to dose on loose ground | More abrupt unless the system is very well set up |
| Maintenance | Needs pad checks, cleaning, and periodic bleeding | Needs cable and housing adjustment, plus pad checks |
| Field repair | Harder without the right fluid and tools | Easier to improvise with basic tools |
| Best use | MTB, trail, enduro, wet off-road riding | Budget bikes, simple setups, easier roadside service |
For off-road riding, that difference matters because you want braking that is easy to dose, not just strong. On steep, loose ground I would take a properly set-up hydraulic brake over a perfectly adjusted cable brake every time, because the feel stays more consistent when the trail gets ugly. The next step is knowing how to spot trouble before it becomes a trail-side problem.
What I check before every ride
This is the part that saves money. I look at the brakes before I think about a bleed, because many bad-brake complaints are really pad wear, contamination, or wheel alignment problems.
- Squeeze each lever and feel for a consistent bite point.
- Spin the wheel and listen for light rotor rub.
- Check pad thickness through the caliper opening.
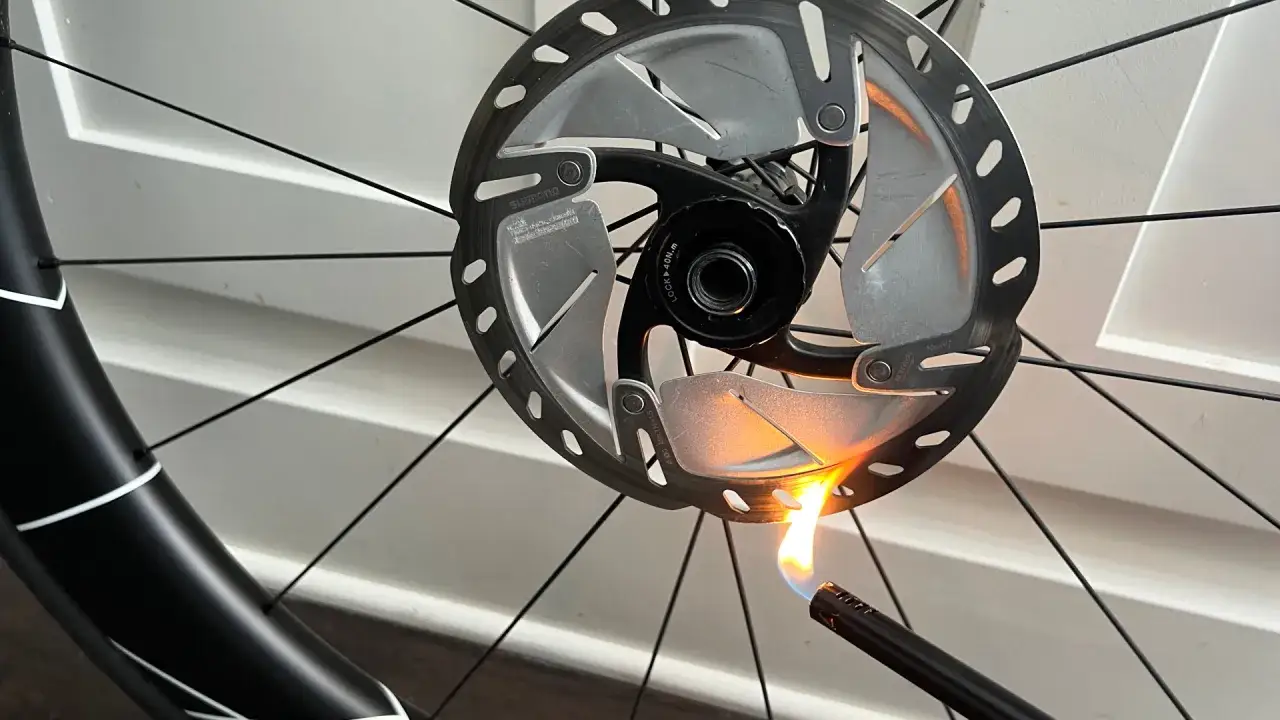
- Inspect the rotor for grooves, blueing, or embedded dirt.
- Wipe the rotor with isopropyl alcohol and a clean rag if it picked up chain lube, polish, or greasy fingerprints.
- Confirm the wheel is seated correctly in the frame or fork before blaming the brake.
- Look for wetness around hose fittings, the lever body, or the caliper.
If the lever feels normal but the brake still whispers, rub and contamination are likely to blame. If the lever pulls too far, air or pad wear moves up the list. That takes us into the service side of the diagnosis.
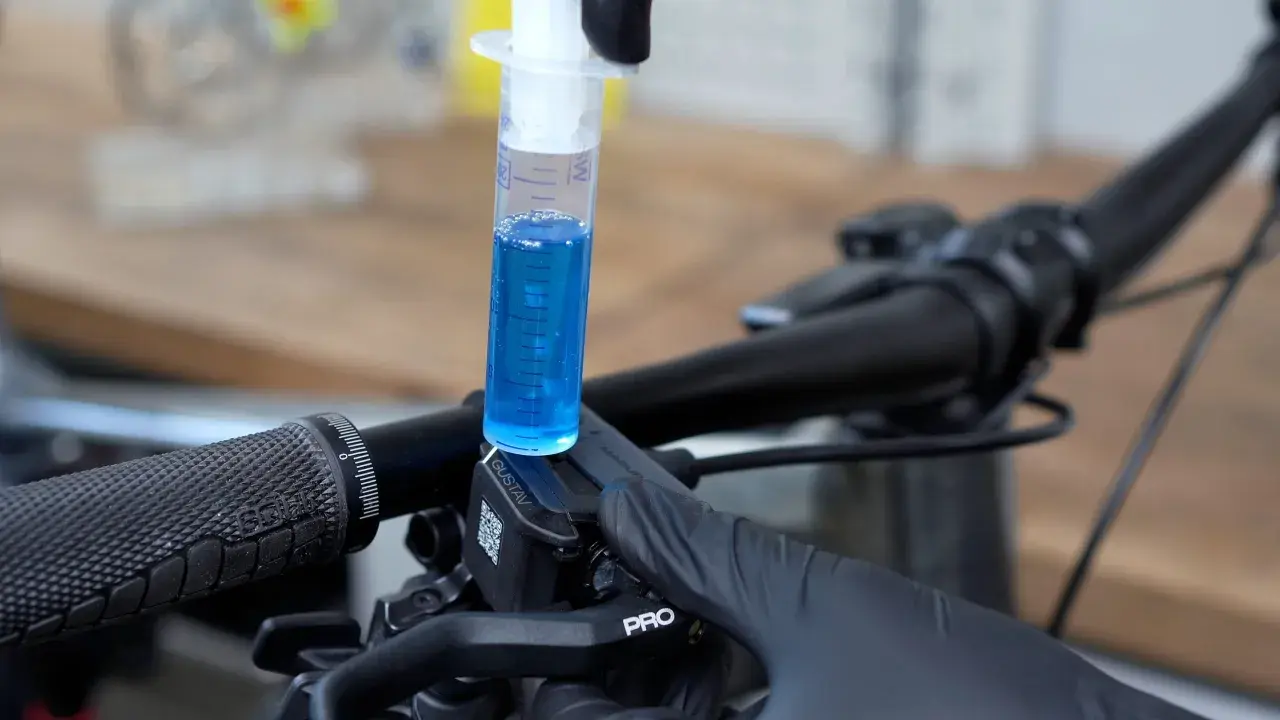
When a bleed is the real fix
A bleed is not a cosmetic service. It is the fix when the lever feels spongy, the bite point drifts, or the lever travels too far before the pads engage. If the brake has lost its crisp feel without any obvious contamination or pad issue, I start thinking about fluid condition and trapped air.
| Symptom | Likely cause | First move |
|---|---|---|
| Spongy lever | Air in the system or old fluid | Bleed with the correct fluid |
| Lever pulls too close to the bar | Pad wear or a system that needs servicing | Inspect pads first, then bleed if needed |
| Power fades after long descents | Fluid ageing, heat build-up, or poor pad choice | Check fluid, pads, and compound choice |
| One pad drags constantly | Sticky piston or caliper misalignment | Clean the pistons and realign the caliper |
| Noise continues after bed-in | Contamination or a damaged rotor surface | Clean the rotor, then inspect the pads |
Bleed intervals matter as much as symptoms. DOT-fluid brakes should be bled at least once a year, while mineral oil systems usually go closer to every two years unless you ride hard, brake often, or spend your time in wet conditions. If you change pads or rotors, bed them in again before you judge the brake. A clean bleed gives you the right lever feel; the pad and rotor setup decides whether that feel translates into real trail control.
Pads, rotors, and compounds that matter in wet conditions
For UK off-road riding, compound choice is not a small detail. Wet trails, grit, and repeated braking all shorten pad life, so the wrong compound shows up quickly in winter.
| Compound | Best for | Trade-off |
|---|---|---|
| Organic | Quieter riding, strong initial bite, quicker bed-in | Wears faster in mud and wet conditions |
| Sintered | Steep descents, wet trails, long braking | Noisier, needs more bed-in, less initial grab |
I usually see sintered pads make more sense through a British winter, while organic pads feel nicer in dry weather or for riders who value silence over lifespan. Some brands split hairs further, but those two choices cover most real-world trail decisions.
Use the same compound unless you have a reason to change. If you switch compound type, fit new rotors as well; otherwise the old transfer layer can bring back noise and inconsistent braking. On some SRAM systems, pads are due at 3 mm or less total thickness, and rotors should be replaced once they fall below the minimum stamped on the disc. If you are near that limit, do not wait for a squeal to make the decision for you.
Once the fluid, pads, and rotors are in good shape, the brake should feel boring in the best possible way. That is the state you want before a wet descent, not an over-tuned setup that feels clever on the stand and vague on the trail.
The maintenance rhythm I would actually follow on a trail bike
I prefer a boring rhythm: quick checks before rides, a proper inspection each month, and a bleed only when the symptoms or the service interval justify it. That keeps the brake predictable without turning maintenance into a ritual.
- Before rides: check lever feel, rotor cleanliness, and any unusual pad drag.
- Monthly: pull the wheel, inspect pad thickness, and check the rotor against its minimum spec.
- After wet winter rides: dry the bike, wipe the rotors, and inspect for contamination.
- After new pads or rotors: bed them in properly before hitting steep trails.
- Seasonally: bleed when due, especially if the bike sees long descents or a lot of muddy mileage.
- All year: keep spray lube, chain degreaser, and greasy fingers away from the braking surface.
The goal is not to make the brake feel fancy on the stand; it is to make it predictable when the trail pitches down, the ground is loose, and your hands are already busy. Keep the system clean, use the right fluid, and replace wear parts early enough that braking never becomes a question mark.