The quickest route to a balanced setup
- Sag comes first because it sets where the fork and shock sit in their travel.
- For many air forks, a good starting point is 15-20% sag; for many rear shocks, start around 25-30%.
- Rebound should be fast enough to recover for the next hit, but not so fast that the bike kicks back.
- Compression adds support for braking, pumping, and bigger impacts, but it should not be used to hide the wrong spring rate.
- If the bike bottoms out too easily with sag already correct, volume spacers or a firmer spring are often the real fix.
- On wet British trails, cleaning and service discipline matter as much as click settings.
What a good setup actually changes on the trail
When I set suspension, I am not chasing a perfect number for its own sake. I want the bike to hold traction on roots, stay composed under braking, and still use travel when the trail gets rough. That balance changes with the kind of riding you do: a slippery Welsh woodland descent asks for a different feel than a fast, repetitive XC loop or a steep bike park line.
| Terrain or riding style | What I want from the suspension | First adjustment I look at |
|---|---|---|
| Wet roots, off-camber trails | More grip and better wheel contact | Sag and rebound, then keep compression fairly open |
| Steep descents and repeated braking bumps | More chassis support and less dive | Low-speed compression and rebound speed |
| Rolling XC and marathon rides | Efficiency without feeling harsh | Sag first, then a light compression tweak |
| Fast, rough, bike-park style hits | Bottom-out control and stable recovery | Rebound, compression, and sometimes volume spacers |
Once I know what the bike needs, I set sag first, because every other adjustment is built on that number. From there the rest of the setup becomes much easier to judge.
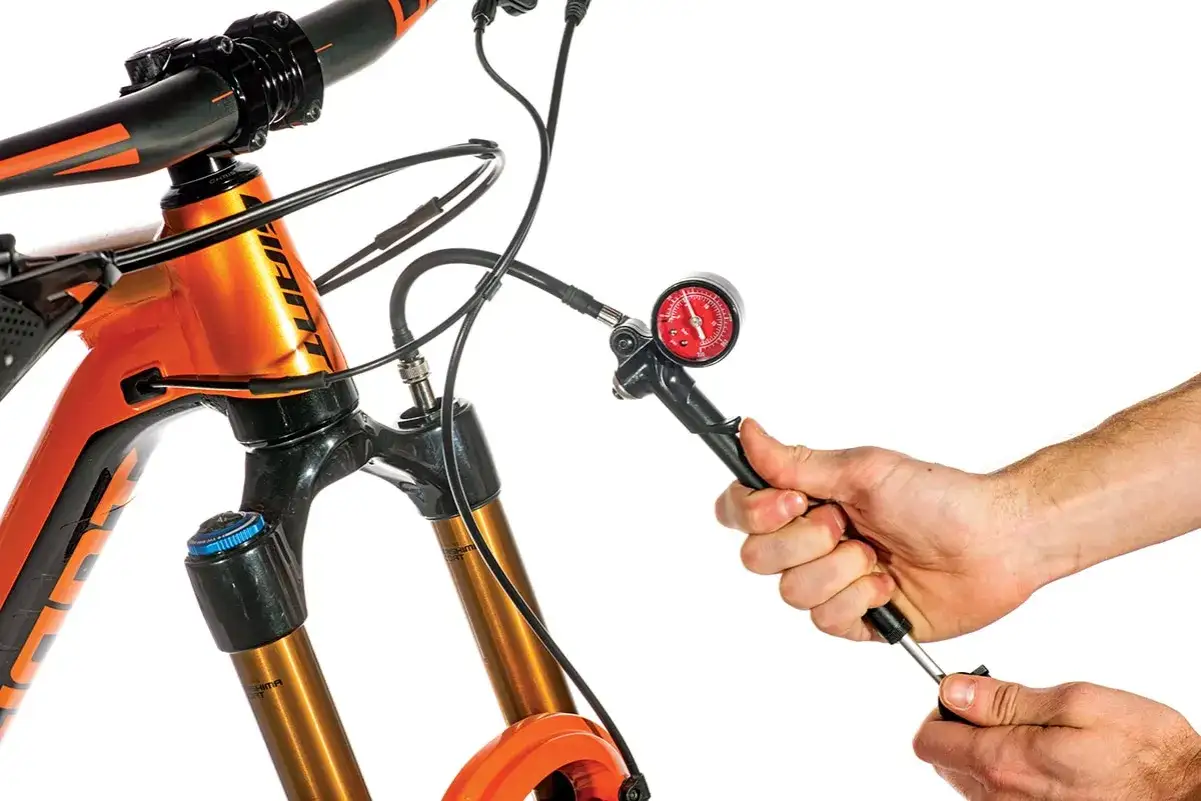
Set sag with your riding kit on, not in the workshop clothes
Sag is simply how much the suspension settles under your weight in a normal riding position. It is the base of the whole setup because it controls ride height, available support, and how much travel you keep in reserve for bumps. If sag is wrong, every other click starts from the wrong place.
For many modern air forks, a sensible starting point is 15-20% of total fork travel. A 160 mm fork, for example, would sit roughly 24-32 mm into its travel. For many air rear shocks, a good baseline is 25-30% sag, although some specific models or more aggressive enduro setups can run deeper if the manufacturer says so.
| Fork travel | 15% sag | 20% sag |
|---|---|---|
| 120 mm | 18 mm | 24 mm |
| 140 mm | 21 mm | 28 mm |
| 160 mm | 24 mm | 32 mm |
| 180 mm | 27 mm | 36 mm |
My setup routine is simple. I put on my helmet, shoes, and hydration pack if I ride with one, open the compression lever or dial fully, and use the bike in a normal standing or seated riding position for a few seconds before measuring. Then I check the O-ring or zip tie position and adjust air pressure in small steps until the sag is right. If I need a lot of pressure to get there, or a coil shock needs a lot of preload, I stop and question the spring rate rather than forcing the number.
The main trap here is rushing. You want a repeatable measurement, not a guess made while leaning on a wall. Once sag is close, rebound becomes much easier to read on the trail.
Dial rebound so the wheels recover in time for the next hit
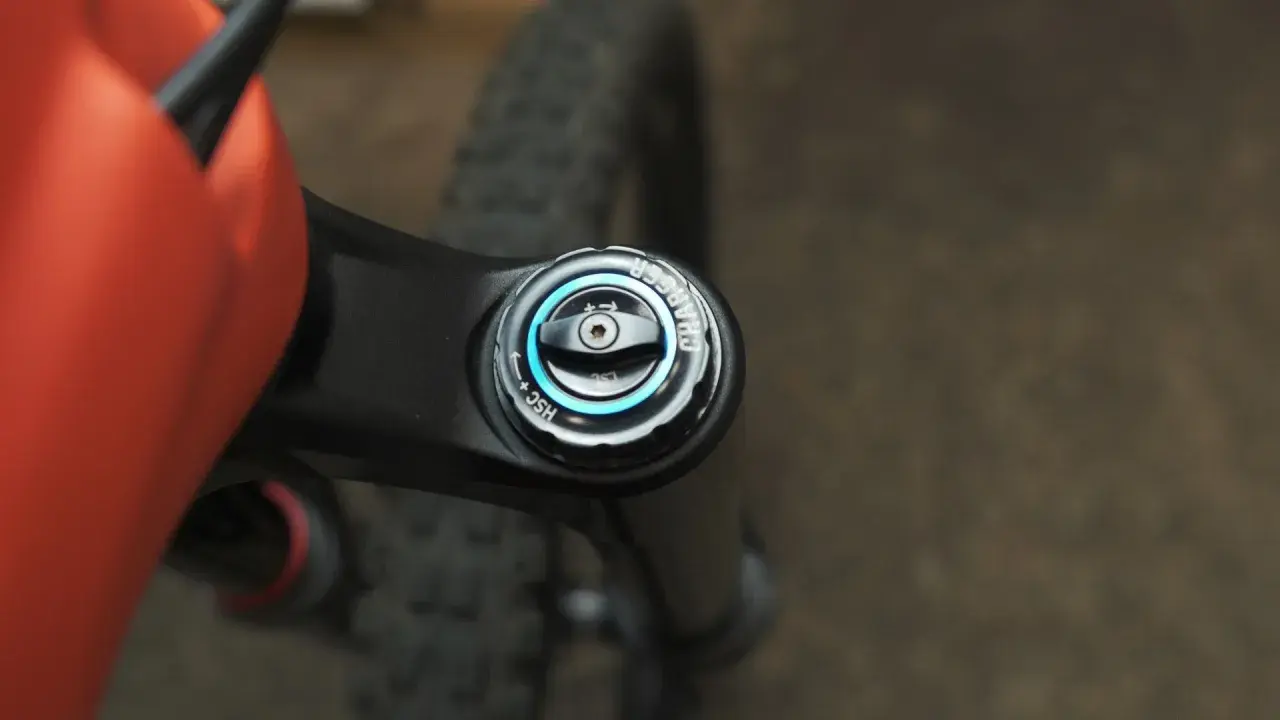
Rebound controls how quickly the fork or shock returns after compression. The practical target is simple: the suspension should come back quickly enough to be ready for the next bump, but not so quickly that it kicks you back or lifts the wheel off the ground. Most dampers adjust slower when you turn the knob clockwise and faster when you turn it counterclockwise, although it is still worth checking the icons on your own unit.
I always start from the manufacturer’s closed position or recommended starting point, then move in one small step at a time. If the bike feels like a pogo stick after a hit, I slow rebound down. If it feels like it is packing down and riding lower and lower through a rough section, I speed rebound up.
| What the bike feels like | What is probably happening | First change I make |
|---|---|---|
| Kicks back after compressing | Rebound is too fast | Slow it down by 1-2 clicks |
| Feels short-travelled after repeated hits | Rebound is too slow | Speed it up by 1-2 clicks |
| Traction disappears on repeated roots | The wheel cannot follow the ground quickly enough | Open rebound a little and test again |
| Bike feels lively but unstable | Rebound is a touch too fast | Add a small amount of rebound damping |
One detail matters more than many riders expect: if you change air pressure by about 5-10 psi, you often need to revisit rebound. More spring force usually needs more damping to keep the bike controlled. I do not try to correct that from memory; I ride the same test section again and listen to what the bike is doing, not what I hope it is doing.
With rebound close, compression starts to make sense rather than masking a bigger problem.
Use compression to add support without killing grip
Compression damping is there to control how easily the suspension compresses. I treat it as a support tool, not a cure-all. Low-speed compression deals with slower inputs like pedalling load, braking, pumping, and body movement. High-speed compression deals more with sharp hits, landings, and square-edged impacts. If your damper only has one compression knob, it is basically blending those jobs together.
| Compression mode | What it changes | Good use case |
|---|---|---|
| Open | Least resistance, most sensitivity | Rough descents, roots, wet trail centres |
| Pedal or middle position | More platform, still some bump compliance | Rolling terrain, smoother climbs, all-day trail riding |
| Lock or firm | Strong resistance to bob | Smooth road transfers or very smooth climbs only |
My rule is to keep compression as open as I can while still getting the support I need. If the fork dives too much under braking, I add a little low-speed compression. If the bike wallows in a berm or sinks too deeply into travel when I push into a roller, I add a touch more support. If the suspension starts deflecting off roots or stones, I have gone too far.
This is where a lot of riders overcorrect. They reach for more compression because the bike feels soft, but the real issue is often sag, spring rate, or rebound. Compression should refine the ride, not prop up a bad spring choice.
Know when air spacers or a different spring rate are the real fix
If sag is correct but the bike still blows through travel too easily, or if it never reaches full travel even with sensible sag, the spring curve is probably the issue. On air forks and shocks, volume spacers change the amount of mid-stroke and bottom-out resistance. They make the spring more progressive, which means the end of the travel ramps up more sharply.
That is useful when the bike feels good off the top but collapses too quickly near full compression. It is not useful if the bike is already too harsh at the top of its travel. In that case, more spacers would make the problem worse. I usually think of spacers as a fine tool for shaping the last part of the stroke, not as a substitute for correct sag.
| System | What to change first | What to watch out for |
|---|---|---|
| Air fork or air shock | Air pressure to hit sag, then volume spacers if bottom-out control is wrong | Too much pressure makes the ride harsh before the travel is used |
| Coil shock or coil fork | Spring rate first, then rebound and compression | Too much preload is a sign the spring rate is wrong |
On a coil setup, preload is a trimming tool, not a fix. If I need to wind in a lot of preload just to reach the right ride height, I treat that as a spring-rate problem and swap springs instead of pretending the damping will solve it. That is one of those boring choices that saves a lot of bad trail time later.
Once the spring is right, the rest of the tuning becomes much more predictable.
Avoid the mistakes that ruin a good setup
The biggest setup errors are usually simple ones, which is why they keep happening. Riders often change too many things at once, copy someone else’s click settings, or set sag with the wrong kit on. A suspension tune is personal. It depends on rider weight, bike geometry, riding style, tyre pressure, and the kind of trail you actually ride.
- Setting sag in casual clothes, then riding in full kit with a hydration pack.
- Leaving the compression lever partly closed while measuring sag.
- Changing air pressure, rebound, and compression in the same adjustment session.
- Testing only on a smooth car park instead of a repeatable trail section.
- Copying a friend’s click count without checking whether their spring rate and bike kinematics are the same.
- Trying to fix a wrong spring rate with damping alone.
I also see riders ignore the relationship between air pressure and rebound. If you add pressure to make the bike sit higher, the suspension usually needs more rebound damping to stay controlled. If you drop pressure, the rebound often needs to come back a little. That one detail explains a lot of why a setup can feel great one week and messy the next after a pressure change.
The safest way to work is still the old-fashioned way: change one thing, ride one repeatable section, and write the result down.
Keep the feel consistent through a British winter
Wet, muddy, cold riding exposes suspension problems faster than dry summer trails. Dirt dries on the stanchions, drag builds up, and pressure can drift a little with temperature changes. If I want a bike to feel the same from one ride to the next, I pay as much attention to cleaning and maintenance as I do to click settings.
After every ride, I wipe the fork stanchions and shock shaft, clean the seals with mild soap and water if needed, and avoid blasting the bike with a pressure washer. That sounds basic because it is basic, but it matters. Regular exterior cleaning stops grit from chewing through wiper seals and keeps the action smooth. On products that publish hour-based service intervals, the important part is not memorising every number; it is shortening those intervals when conditions are wet, muddy, dusty, or generally harsh.
- Check fork and shock pressure before rides in cold weather.
- Wipe the stanchions and shaft after muddy rides.
- Log psi, rebound clicks, compression clicks, and spacer count in your phone.
- Recheck sag after several rides, not just after the first setup.
- Service sooner if you ride through winter mud, lift-accessed parks, or very dirty trails.
That habit is what keeps a good setup good. Suspension does not stay dialled by accident; it stays dialled because the bike is clean, the settings are written down, and the rider treats small changes as part of the process rather than as a mystery. If you do that, the ride feels better almost immediately, and it keeps feeling better when the trails get ugly.