
Brake fluid spills are one of those workshop messes that can go from minor to annoying in minutes, especially on a mountain bike with hydraulic brakes. This guide explains how to clean up brake fluid safely, what to do if it touched pads or rotors, and how to dispose of the waste correctly in the UK. I’ll keep it practical: what to wipe with, what to replace, and where the job stops being a cleanup and starts being a brake service.
What matters most when brake fluid reaches a bike
- Move fast. The first minute matters more than the last 10.
- Blot first, then clean. Rubbing only spreads the spill into seals, decals, and friction surfaces.
- Use the right cleaner. Warm soapy water works well for most surfaces; isopropyl alcohol is useful for stubborn residue and rotors.
- Replace contaminated pads. Once pad material soaks up fluid, rescue attempts are usually a false economy.
- Treat waste properly. In the UK, brake fluid belongs with hazardous waste, not the sink or general rubbish.
Why a small spill matters more than it looks
The first mistake people make is assuming a tiny drip is only a cosmetic problem. It usually is not. Brake fluid is slippery, it migrates under hose clamps and around bolt heads, and it can ruin braking performance long before the bike looks dirty.
On MTB hydraulics, the main divide is between DOT fluid and mineral oil. DOT fluid is more aggressive on paint and some finishes; mineral oil is less corrosive, but it still contaminates pads and rotors quickly. Either way, if the fluid reaches the friction surface, the brake can start squealing, grabbing unevenly, or feeling weak on the first bite.
| Fluid | Typical MTB systems | What cleanup means | Main risk |
|---|---|---|---|
| DOT fluid | SRAM, Hope, some TRP systems | Blot immediately, then wash the area and finish with a clean dry wipe | Paint damage, seal irritation, pad contamination |
| Mineral oil | Shimano, Magura, some other systems | Wipe it off, then clean the residue with mild detergent or isopropyl alcohol | Slippery residue, rotor and pad contamination |
Shimano’s manuals are very clear on one point I agree with: use soapy water and a dry cloth for routine cleaning, and avoid commercial brake cleaners on brake parts unless the manufacturer specifically allows it. That is the safest baseline when you are working around seals, levers, and calipers. Once you have that in mind, the rest is just about having the right kit within reach.
What I keep beside the workstand
Before I crack open a bleed port or loosen a hose fitting, I want the cleanup tools already on the bench. If the spill happens and you start hunting for cloths, the fluid has already won a few centimetres of ground.
- Nitrile gloves
- Lint-free cloths and paper towels
- 90% isopropyl alcohol
- Warm water with a mild detergent
- Absorbent granules or cat litter for floor spills
- Sealable bags or a lidded container for contaminated waste
- A plastic tray, drip mat, or piece of cardboard under the bike
- A separate clean cloth for brake parts only
I also keep one practical rule: never use the same cloth on a clean rotor and a dirty spill. That sounds obvious, but on a muddy trail bike it is easy to forget when you are moving fast.
If you are working on carbon parts, stay conservative. A soft cloth and neutral detergent are the better call there than anything harsh or solvent-heavy, especially on lever bodies, decals, and painted finishes. Once the kit is in place, the actual cleanup is straightforward.
My step-by-step method for fresh spills
- Stop the source first. Close the reservoir, cap the syringe, tighten the fitting, or set the bike upright so the spill does not keep feeding itself.
- Put gloves on before you touch anything else. DOT fluid in particular is not something I want on bare skin for long.
- Blot, don’t scrub. Use a dry cloth or paper towel to lift the liquid. Press and replace the cloth rather than dragging the spill around.
- Clean the affected surface. For frames, levers, calipers, and other painted or finished parts, I start with warm soapy water. If there is still a film, I follow with isopropyl alcohol on a clean cloth.
- Handle floor spills separately. Cover the spot with absorbent granules or cat litter, leave it for 10 to 15 minutes, then sweep it into a sealed bag before wiping the floor with detergent and water.
- Dry everything completely. Brake fluid likes to hide around hose clamps, bolt heads, and the edge of the reservoir cap. I always check those places twice.
- Inspect before you test. If the brake lever still feels soft, or you can see fresh wetness returning, the problem is not a spill any more. It is a leak.
For most frame and workshop surfaces, that sequence is enough. The harder question is what to do when the fluid has reached the brake’s friction surfaces, because that changes the answer completely.
What changes when the spill reaches pads, rotors, or tyres
Once brake fluid gets onto the friction side of the system, I stop thinking about “cleanup” and start thinking about contamination control. A rotor can usually be cleaned. A pad that has soaked up fluid usually cannot be trusted again.
| Part | Best response | When I replace it |
|---|---|---|
| Pads | Try to keep them isolated and dry, but do not wash them with the hope of restoring performance | As soon as fluid reaches the pad material |
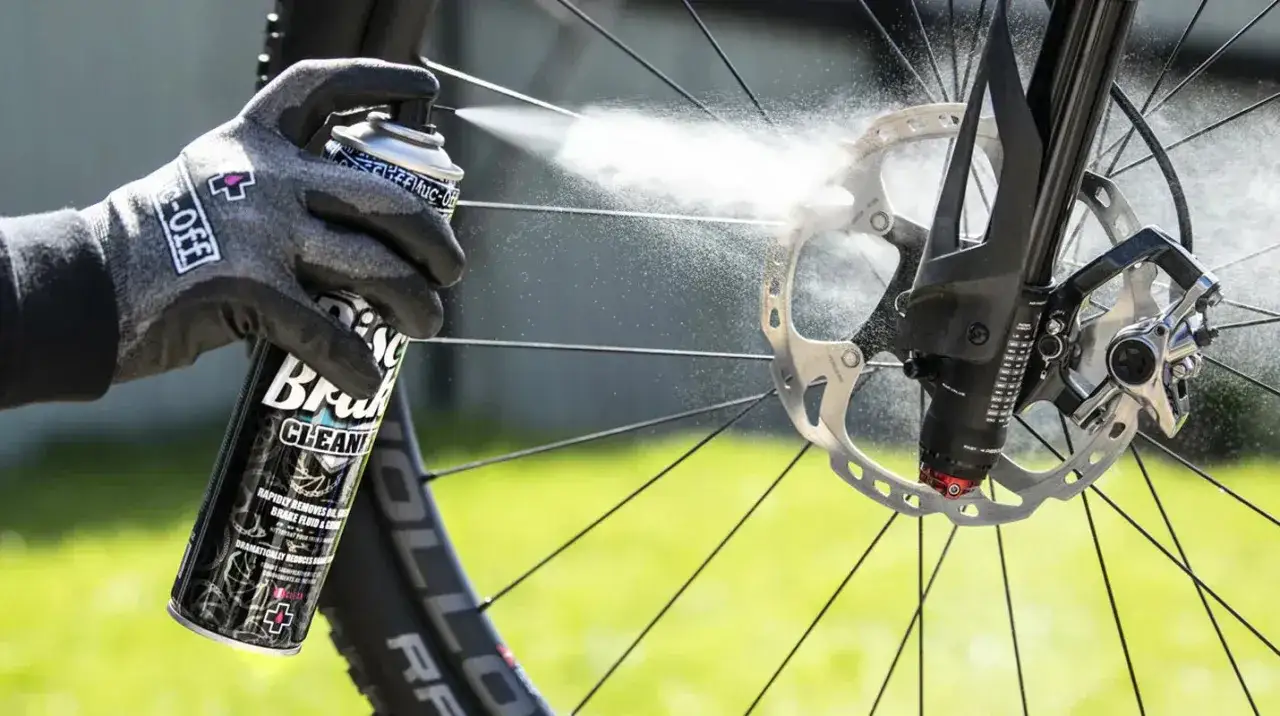
| Rotors | Wipe with isopropyl alcohol and a lint-free cloth, then wipe again with a dry cloth | If they still squeal, feel greasy, or refuse to bed in properly after cleaning |
| Tyres and grips | Wash with warm soapy water, rinse, and dry fully | If the tread or grip surface still feels slick after cleaning |
| Caliper and lever bodies | Clean the outside, then inspect for leaks around seals and fittings | If the spill keeps coming back from the same point |
In my experience, a contaminated rotor often looks clean long before it behaves clean. That is why I do not trust appearance alone. After cleaning, I want a cautious test ride and a few controlled stops, not a full send down a descent.
For pads, I am blunt: if they have taken in brake fluid, replace them. There are edge cases where a light mist on the surface can be managed, but once the material has absorbed fluid, the chance of getting reliable bite back is poor. On a mountain bike, that is not a gamble I would recommend.
If the spill happened while the wheel was out, keep the rotor protected from new contamination while you work. That is the part people miss: they clean one area carefully, then touch the rotor with the same glove or rag that already has fluid on it. One careless pass undoes the whole job.
How I handle disposal without making the problem bigger
In the UK, I treat brake fluid as hazardous waste. That means no sink, no drain, and no casual binning of soaked rags as if they were ordinary workshop paper. The risk is not just the fluid itself; it is the way it spreads through absorbents, cloth fibres, and packaging.
My rule is simple. If it touched brake fluid, it goes into a sealed bag or a clearly labelled container. That includes paper towels, absorbent granules, nitrile gloves, and any cloth I would not want back on a clean bike. Leftover fluid stays in its original container if possible, or in a sealed, clearly marked substitute if the original bottle is damaged.When I am ready to get rid of it, I use the local council’s household waste recycling or hazardous waste route rather than trying to improvise. The exact service varies by area, but the principle does not: keep brake fluid out of general household waste and away from water systems. That is the cleanest and most responsible way to finish the job.
Once the waste is out of the way, the only sensible thing left is prevention. A cleaner bleed is always cheaper than a contaminated brake set.
The habits that stop the next spill
The best cleanup is the one you never need. My workshop routine is built around small habits that seem boring until they save a brake lever, a rotor, or an afternoon.
I keep a pad spacer or bleed block ready before I open the system, and I place a rag under the caliper before anything loosens. I also cap the fluid bottle as soon as I am done pouring, because open containers are where a lot of the mess comes from. If I am bleeding a bike on a stand, I position the bike so the lever and caliper are both easy to reach without swinging the hose around.
The other habit is slower and more important than it sounds: I pause and wipe fittings before I move the bike. A tiny bead of fluid on a banjo bolt or bleed port can fall later, after you have already put the tools away and walked off. That is how “finished” jobs turn into mystery stains on the floor.
For trail bikes, mud adds another reason to be careful. Dirt sticks to fluid instantly, and then you are not just cleaning a spill; you are grinding grit into seals, decals, and rotor surfaces. A neat bleed setup, a separate clean cloth, and a few seconds of patience are usually enough to keep that from happening. That is the difference between a tidy service and a brake problem you can hear on the first descent.