A bent derailleur hanger can turn a healthy drivetrain into a bike that skips, hesitates, or refuses to hold a clean gear no matter how carefully you tune it. On MTB and trail bikes, I treat the hanger as the bike's mechanical fuse: cheap to damage, cheaper to replace than a derailleur or frame, and easy to overlook when the symptoms look like a simple indexing problem. This article explains how to spot the fault, check alignment properly, decide whether to straighten or replace the part, and estimate what it usually costs in the UK.
Key points at a glance
- If shifting suddenly gets worse after a knock or crash, check the hanger before touching cable tension or limit screws.
- A small bend can create shifting errors that show up only in certain gears, especially at the ends of the cassette.
- Straightening is fine for mild misalignment, but cracks, damaged threads, or repeated bends usually mean replacement.
- In the UK, replacement hangers commonly sit around the £8 to £20 mark, with rarer OEM parts costing more.
- A spare hanger matched to your frame model saves a lot of time if you ride rough trails or travel with the bike.
Why a slightly bent hanger throws shifting off
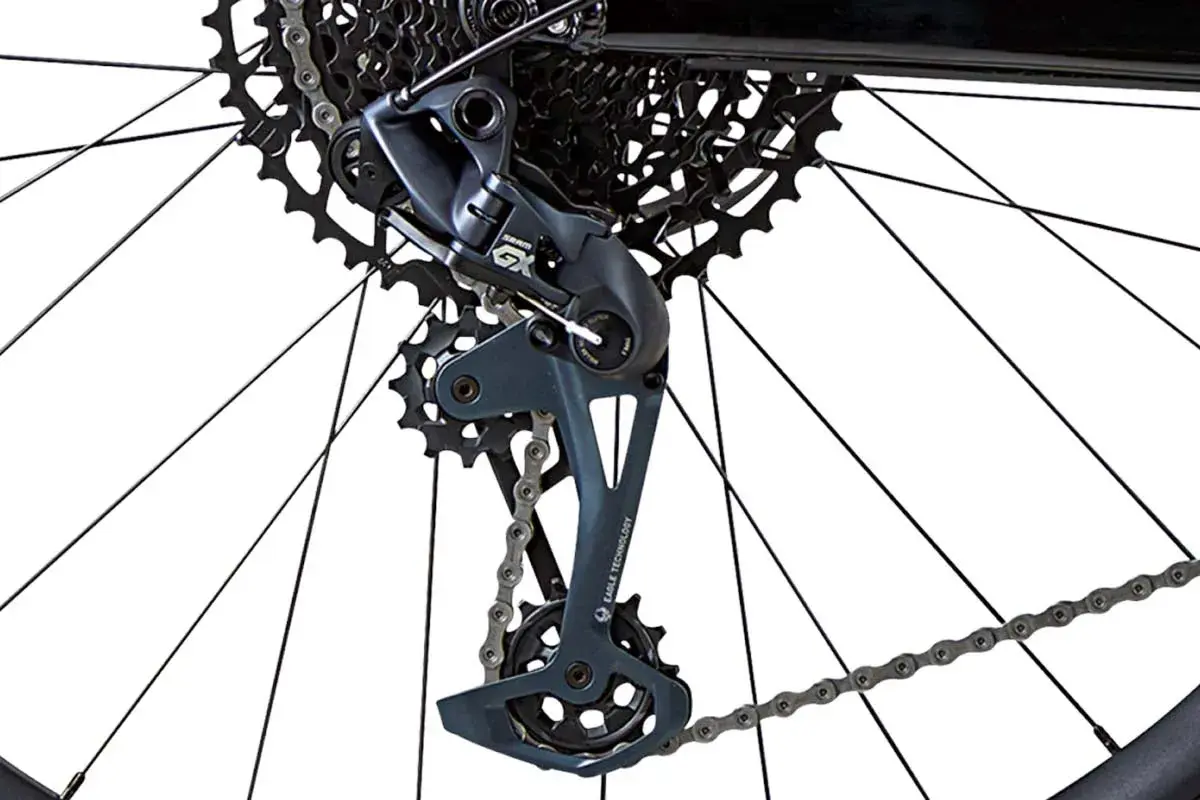
The hanger is the small alloy link between the frame and the rear mech. Its job is simple but critical: it holds the derailleur in the correct plane so the upper jockey wheel tracks the cassette cleanly. When that plane changes, even by a little, the derailleur no longer moves the chain in the tidy, predictable way the shifter expects.
That is why the fault often looks like a tuning issue at first. You might get decent shifting in the middle of the cassette, then noisy, hesitant, or missed shifts as you move to the biggest or smallest sprockets. Geometry problems do not respond like cable problems. A barrel adjuster can fine-tune cable tension, but it cannot correct a derailleur that is sitting at the wrong angle.
In practical terms, I think of the hanger as part of the drivetrain's alignment system. If it is off, the derailleur cage is off, the chain line is off, and the whole setup starts asking for more adjustment than the system can sensibly give. That is why the signs matter so much, which is the next thing I look for before I start making corrections.
How to spot the damage before you chase cable tension
The fastest clue is inconsistency. If the bike shifts cleanly in some gears but poorly in others, especially after a knock, I stop blaming the cable and look at the hanger. A rear mech that suddenly sits closer to the spokes or looks twisted when viewed from behind is another strong warning sign.
- The bike shifts smoothly in the centre of the cassette but hesitates at the top or bottom end.
- You hear chain rub or clicking in gears that used to be quiet.
- The rear derailleur pulley wheels no longer look square to the cassette when you stand behind the bike.
- The bike was dropped, crashed, leaned hard against a wall, or transported with the rear wheel out.
- Shifting got worse after a rocky descent, a trail-side strike, or a rear-wheel removal and refit.
I also check for damage that mimics a bent hanger. A loose thru-axle, a bent rear axle, or a damaged dropout can produce similar symptoms, and those faults need a different fix. If the hanger is visibly cracked, the threads look stretched, or the derailleur has been hit hard enough to twist the cage, I do not waste time trying to "tune it out". That leads straight into why these parts bend in the first place.
Why MTB and trail bikes bend hangers so often
Off-road bikes are exposed to far more lateral impacts than road bikes, so hanger damage is common. On a trail bike, the rear mech sits low and vulnerable, and the hanger is the first thing to absorb a knock from rocks, roots, fallen bikes, or a poor landing. It is designed to give way before the frame does, which is sensible engineering, but it means the part lives a hard life.
Typical causes include:
- Side impacts in a crash or low-speed tip-over on the drive side.
- Rock strikes or trail debris hitting the derailleur cage and levering the hanger.
- Bike transport damage when the rear mech is squeezed in a car rack or van.
- Incorrect wheel installation or a loose axle that lets the wheel sit slightly out of line.
- Repeated hits on rough terrain, especially with longer-cage derailleurs that sit further outboard.
One detail riders often miss is that a hanger can be bent without looking obviously destroyed. A few millimetres of movement is enough to upset shifting, and the bike may still roll fine, which is why the problem gets blamed on the shifter, the cable, or the derailleur itself. Once you understand that, the sensible next step is to check alignment properly instead of guessing.
How I check hanger alignment without guessing
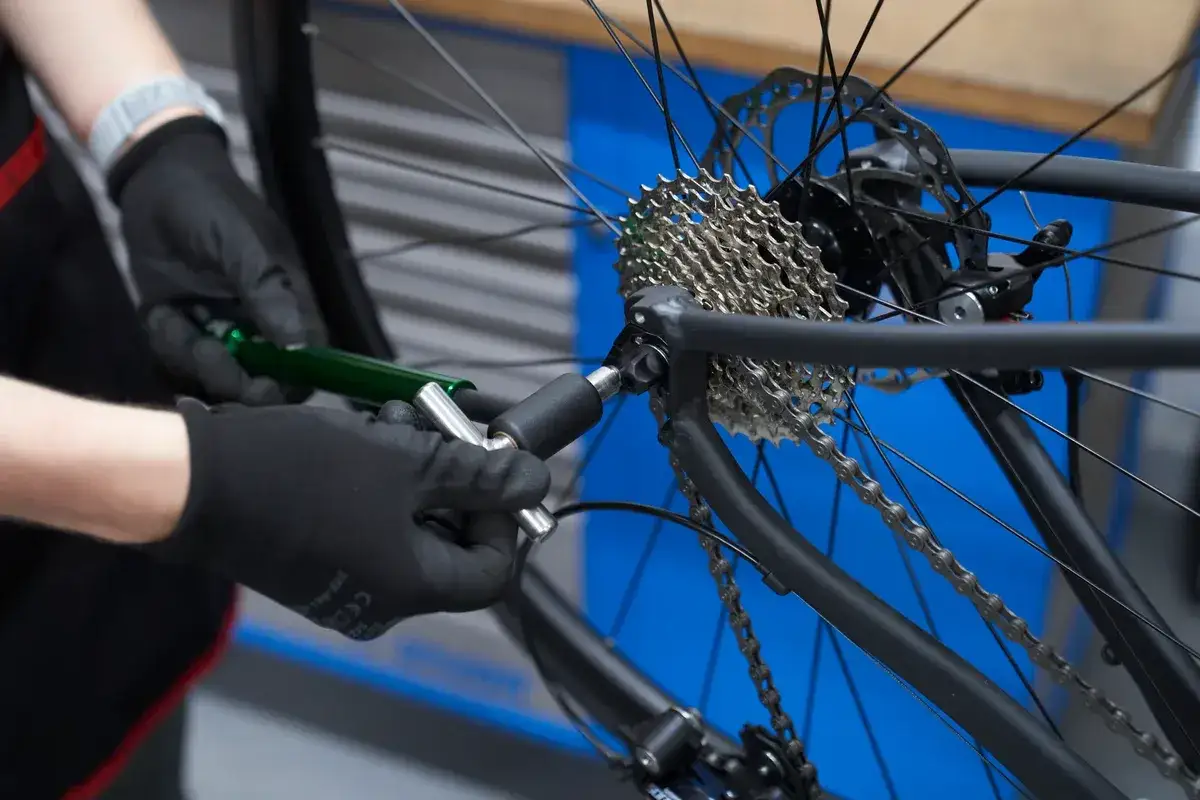
If I want a trustworthy answer, I use an alignment gauge. The tool threads into the hanger and lets you compare the hanger position at several points around the wheel, so you can see whether it is square to the rear axle or pulled off to one side. Park the bike securely, remove the rear wheel, and work slowly. On modern drivetrains, especially 11- and 12-speed systems, accuracy matters more than "close enough".
- Remove the rear wheel so the gauge can sit directly on the hanger.
- Thread the alignment gauge in by hand and tighten it gently, without forcing the threads.
- Set the gauge pointer against the rim or another consistent reference point.
- Rotate the gauge to several positions around the wheel and compare the distance each time.
- Correct the hanger in small movements, rechecking after each adjustment.
- Reinstall the wheel, reset indexing, and test every gear under light load.
If you do not have a gauge, a straight wheel rim can give you a rough indication, but I would not trust that method as a final answer on a modern MTB. It is too easy to fool yourself with a visual check, and the drivetrain will punish that mistake on the trail. Once the alignment is known, the real decision is whether the hanger can be saved or should be replaced.
Straighten it or replace it
This is the point where a lot of riders waste time. A hanger is made to deform, but not every bend should be bent back. My rule is simple: if the part is only slightly out and the metal still looks clean, straightening is usually fine. If the hanger has been bent more than once, shows cracks, or has damaged threads, replacement is the safer call.
| Situation | Best move | Why it makes sense |
|---|---|---|
| Light bend, no visible cracks | Straighten and re-align | Often restores shifting quickly and cheaply |
| Repeated bends or a heavy crash | Replace the hanger | Repeated correction can weaken the alloy |
| Damaged threads or mashed bolt faces | Replace the part | Bad threads create poor derailleur mounting and unreliable alignment |
| Integrated hanger or dropout damage | Get the frame assessed | The problem may be deeper than the removable hanger |
I also remind riders that a new hanger still needs alignment. Manufacturing tolerances are good, but not perfect, and a fresh part can still sit slightly out. That is why the sequence matters: fit the right part, align it, then set the derailleur. With that in mind, the next question is usually cost.
What the repair usually costs in the UK
The good news is that the hanger itself is normally the cheapest part of the whole drivetrain repair. In the UK, common replacement hangers often sit around £8 to £20, while harder-to-find OEM parts or premium machined versions can rise to around £25 to £40+. If your bike uses a current standard such as UDH-compatible hardware, sourcing can be easier, but frame compatibility still matters.
| Item | Typical UK price band | What affects the price |
|---|---|---|
| Replacement hanger | £8-£20 common, £25-£40+ for rarer parts | Frame model, brand, OEM availability, material |
| Alignment tool | £5-£35 for budget tools, £60-£185 for shop-grade tools | Accuracy, reach, build quality, brand |
| Workshop repair | Usually modest compared with a derailleur replacement | How easy the hanger is to source and whether other parts were hit |
That pricing split tells you something useful: the part is cheap, but downtime is not. If you ride often, a spare hanger in the toolkit or spares box is a smart buy, because it turns a ride-ending problem into a short workshop job. The last piece is making sure the same problem does not keep coming back.
How to keep it from happening again
Prevention is mostly about reducing side impacts and checking the bike after anything suspicious. I always look at the hanger after a crash, after transport with the rear wheel removed, and after any time the derailleur takes a hit on the trail. That habit catches problems while they are still minor.
- Carry a spare hanger that matches your exact frame model.
- Store the bike so the rear mech is not taking the load in a car rack or crowded shed.
- Check axle tightness after wheel removals and long descents.
- Use the correct torque on the hanger and derailleur bolts, not "tight enough by feel".
- Replace a hanger that has been straightened several times instead of trying to rescue it forever.
On modern trail bikes, I also like to keep the frame model and hanger code written down somewhere obvious. That small bit of preparation saves a lot of guesswork when you are standing in a shop or searching for parts after a crash. It also makes the final bit of advice much easier to act on before your next ride.
The spare parts and habits that save the ride later
If I were setting up a bike for rough riding, I would keep three things close: the correct spare hanger, the right tool or shop contact for alignment, and a habit of inspecting the rear mech after any impact. That combination solves most hanger problems before they turn into a bigger drivetrain headache.
The real lesson is simple. A misaligned hanger is not a tuning quirk, and it is not something to keep chasing with the barrel adjuster. Fix the geometry first, then fine-tune the gears. If you do that, the drivetrain stays quieter, shifts more consistently, and is far less likely to punish you halfway through a muddy descent.
For trail riders, that is the practical win: less time fiddling, more time riding, and a much better chance of catching a small problem before it turns into a broken derailleur or a ruined ride.