A clean internally routed dropper can change how a bike feels far more than a new tyre or cockpit swap. RockShox’s Reverb Stealth is built for riders who want that tidy, hydraulic setup without giving up the instant saddle drop that matters on technical climbs and steep descents. In this guide I’m covering what it is, how it fits, what can go wrong, and how I would judge it against cable and wireless alternatives.
The clean build only works when the frame, hose path, and service routine all line up
- It is an internally routed hydraulic dropper post, not a wireless system.
- Current RockShox versions span 30.9, 31.6, and 34.9 mm diameters with 100 to 200 mm of travel.
- The biggest wins are a cleaner cockpit and a protected hose, but installation and bleeding take more care.
- Any time the hydraulic line is shortened or opened to air, the remote needs a fresh bleed.
- RockShox says a Reverb can compress up to 5 mm from full extension; more than that points to a fault.
What the Stealth Reverb actually is
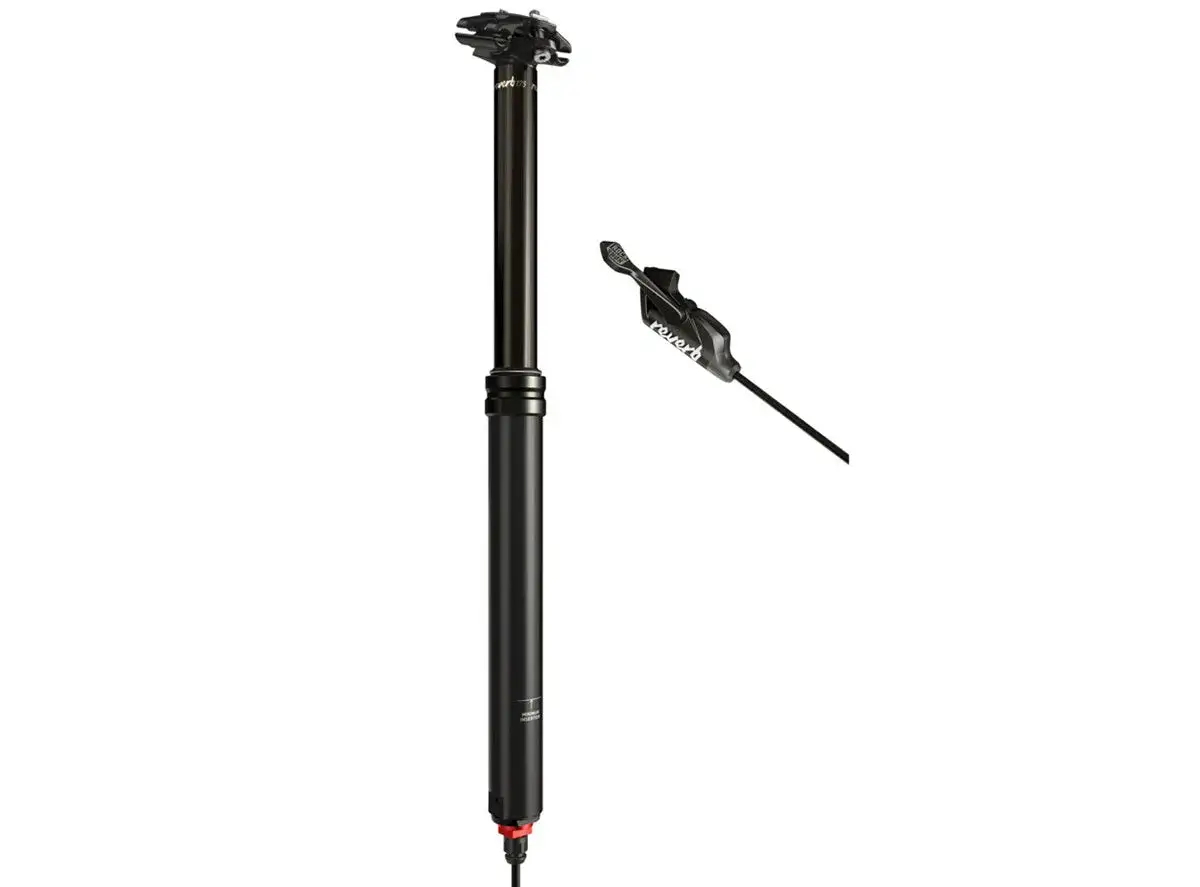
This is a hydraulic dropper seatpost with the hose routed through the frame, so the cockpit stays clean and there is no exposed loop of line flapping around under the saddle. On the current RockShox model pages, the Stealth family is offered in 30.9, 31.6, and 34.9 mm diameters, with travel options from 100 mm up to 200 mm depending on the version. One current build is listed at 31.6 mm, 150 mm travel, and 440 mm overall length, which gives you a useful reference point when you are checking fit.
What matters most is not the name but the package: hydraulic actuation, internal routing, and a remote that lets you drop the saddle without leaving a cable loop exposed. That makes it different from an ordinary cable dropper and very different from a wireless Reverb AXS post. Once that distinction is clear, the next question is whether the routing style is actually an advantage on the trail.
Why internal routing matters on the trail
In practice, internal routing gives you two concrete benefits. First, the cockpit looks and feels cleaner, which matters more than vanity once the bike is covered in winter mud and the bars are already crowded with brake levers, shifter pods, and lockout controls. Second, the hose is better protected from snagging and abrasion, especially on bikes that spend a lot of time in tight woodland or on uplift days where the bike gets thrown around in transit.
The trade-off is real, though. A clean frame usually means more patience during installation, more care when cutting hose length, and more attention when you need service. If you are the sort of rider who likes simple workshop jobs and quick swaps between frames, internal routing is less convenient than it looks on a shop floor. That is why compatibility is the first thing I check before I get excited about the tidy finish.
The fitment checks I would do before buying
Most mistakes happen before the post is even installed. I would always check four things: seat tube diameter, frame insertion depth, hose entry and exit points, and remote layout. If any one of those is wrong, the post can become awkward, noisy, or simply impossible to fit properly.
| Check | Why it matters | What I look for |
|---|---|---|
| Seat tube diameter | The post must match the frame clamp size exactly | Common RockShox sizes are 30.9, 31.6, and 34.9 mm |
| Travel versus insertion depth | Too much travel can make the post hit internal frame limits | Choose 100, 125, 150, 175, or 200 mm only if the frame can accept it |
| Routing path | The hose has to enter and exit the frame cleanly | Ports, guides, and frame design must suit an internally routed post |
| Remote layout | Brake levers and shifter placement can crowd the cockpit | RockShox lists 1X and standard left-below/right-above remote options |
| Bar rotation and hose slack | Too little slack binds the bars; too much creates noise | A smooth steering sweep with no tugging at full lock |
My rule is simple: buy travel for your bike, not for the catalogue photo. A 150 mm post is the sweet spot for many trail bikes, but taller riders and modern frames with generous insertion can justify 175 or 200 mm. If the frame cannot swallow the length, a shorter post that works every time is better than a longer one that looks ideal on paper. That leads straight into the part most riders underestimate: installation.
How installation and hose routing work
The actual install is not complicated, but it is unforgiving of shortcuts. The hose runs from the remote into the frame, then out to the post, and the final length has to allow full bar rotation without tension. I always leave a little extra during the test fit, then trim only once the bars, lever, and saddle position are finalised.
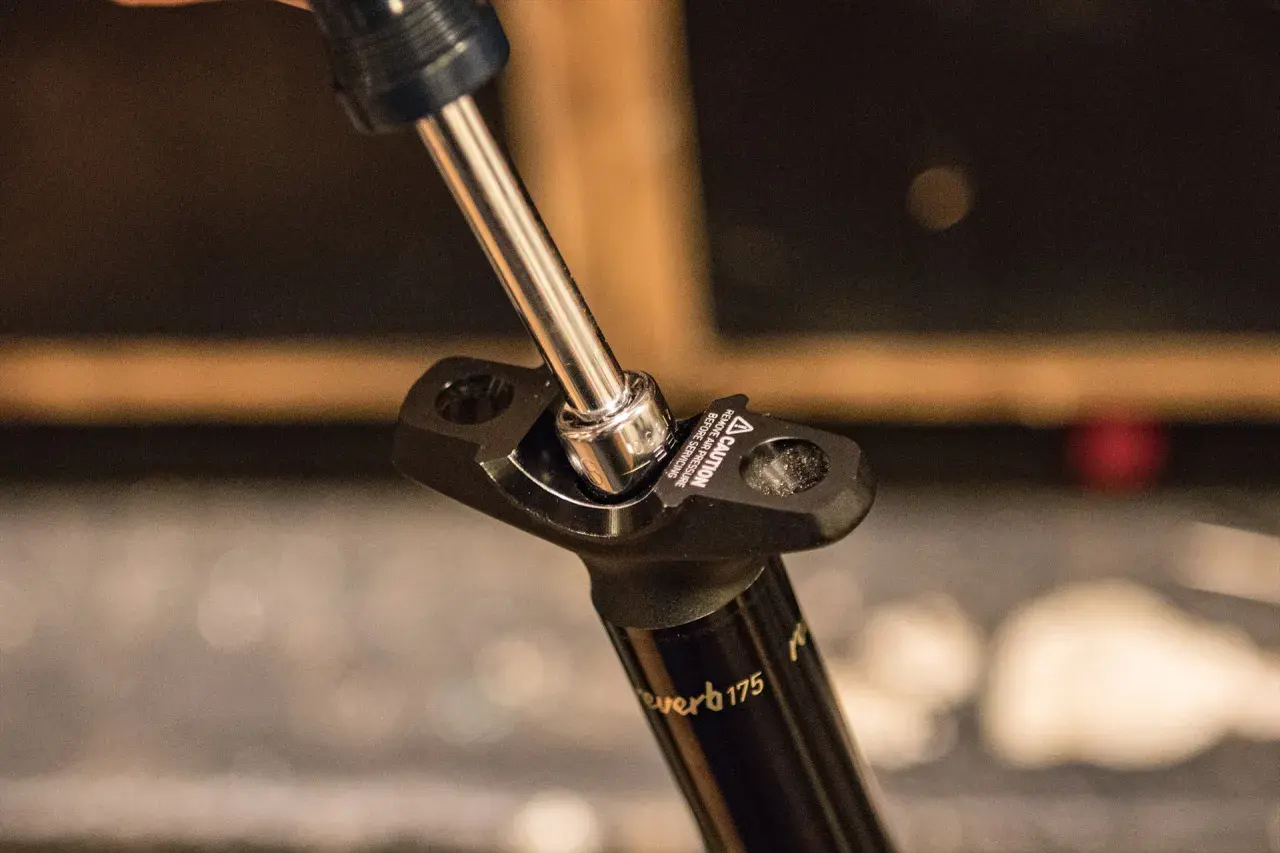
The important detail is the bleed. RockShox states that if the hydraulic line is cut or opened to air, the remote must be re-bled. It also specifies RockShox Reverb Oil and the matching bleed kit, which is not the place to improvise with mystery fluid from the bench. If the hose feels spongy after the build, that is usually a routing or bleed issue, not a sign that the post itself is inherently bad.
Three mistakes show up again and again. The first is cutting the hose too short, which makes bar rotation feel stiff or pulls on the remote at full lock. The second is leaving too much hose, which adds rattle and can look untidy even on a clean frame. The third is ignoring cockpit space, so the dropper lever ends up fighting with the shifter or a brake clamp. Once the install is right, the post is easy to enjoy. When it is wrong, it becomes a small irritation every single ride.
Service, bleeding, and what failure feels like
Hydraulic droppers are smooth when they are healthy, but they are not maintenance-free. RockShox’s support material for the Reverb family still includes bleed instructions, service manuals, and dedicated service kits, which is a good sign that the brand expects these posts to be maintained rather than ignored. On older B1-era units, RockShox also publishes a 50-hour service path alongside longer-interval kits for deeper work.
There is one number I keep in mind when judging wear: RockShox says the post can compress up to 5 mm from full extension. That little bit of movement is normal. More than that points toward air bypass or another internal issue, and at that stage I would stop treating it as cosmetic. A post that sags, returns slowly, or feels inconsistent on the lever usually needs bleeding or seal work before the problem gets worse.
If you service one of these posts yourself, the priority is consistency. Use the correct oil, keep the line clean, and do not rush the bleed because the post still “sort of works.” The difference between a good hydraulic post and a frustrating one is often a few minutes of patience and the discipline to follow the service steps exactly. That brings us to the more practical comparison most riders are actually making.
How it compares with cable droppers and wireless options
I would compare this post against two alternatives: a cable-actuated internal dropper and a wireless system like Reverb AXS. The choice is not about technology for its own sake; it is about how much complexity you want on your bike and how much you value a tidy cockpit.
| Option | What you gain | Main trade-off | Best for |
|---|---|---|---|
| Internally routed hydraulic dropper | Clean look, protected line, precise remote feel | Bleeding and hose work take more care | Riders who want a tidy build and do not mind servicing it properly |
| Cable-actuated internal dropper | Cheaper parts, familiar workshop support, easier swaps | More cable friction and usually less of a polished cockpit | Most riders who want value and simplicity |
| Wireless Reverb AXS | No hose, no cable routing, very clean cockpit, 100 to 250 mm travel on current versions | Highest cost and battery management | Riders who want the cleanest possible build and are happy paying for it |
My honest view is that hydraulic internal routing sits in the middle. It looks more refined than a cable system, but it is still a workshop job rather than a fit-and-forget upgrade. Wireless is cleaner still, but unless you really want the ecosystem and the battery logic, it is hard to justify just for the sake of being wireless. If I am building a bike I service myself, I usually lean cable for simplicity or wireless for total cleanliness, and I choose hydraulic internal routing when the frame and the riding style make it the best compromise.
What I would choose for different riders
For XC and marathon riding, I would keep the travel modest. A 100 mm or 125 mm post is often enough if the bike is built around efficient seated climbing and the frame does not leave much insertion room. That keeps weight down and avoids paying for drop you will not use.
For a UK trail bike, 150 mm is the sweet spot more often than not. It is enough to get the saddle properly out of the way on steep descents, but not so extreme that fit becomes a gamble on many medium-size frames. If the frame allows it, 175 mm is a better choice for taller riders who want more clearance on rough descents and don’t want to compromise body movement behind the saddle.
For enduro and bigger bikes, 200 mm starts to make sense when the frame and rider height justify it. I would not force that much travel into a frame that cannot take it just because the number looks impressive on the box. A shorter post that works every ride beats a longer one that rubs, binds, or forces a poor saddle height.
The decision rule I use before spending the money
When I am deciding on this kind of post, I use one simple filter: if the frame supports the routing properly, the travel fits the insertion depth, and I am happy to bleed and maintain it, the internally routed hydraulic option makes sense. If any of those three points feels shaky, I step back and choose the simpler path. That is not a downgrade; it is a better match for the bike.
For most riders, the right answer is the one that keeps the saddle moving reliably for years, not the one that looks the neatest on day one. Check the diameter, check the travel, check the hose path, and be honest about how much maintenance you want to own. That approach saves money, avoids frustration, and gets you to the real goal: a bike that disappears underneath you on the trail and just does the job.